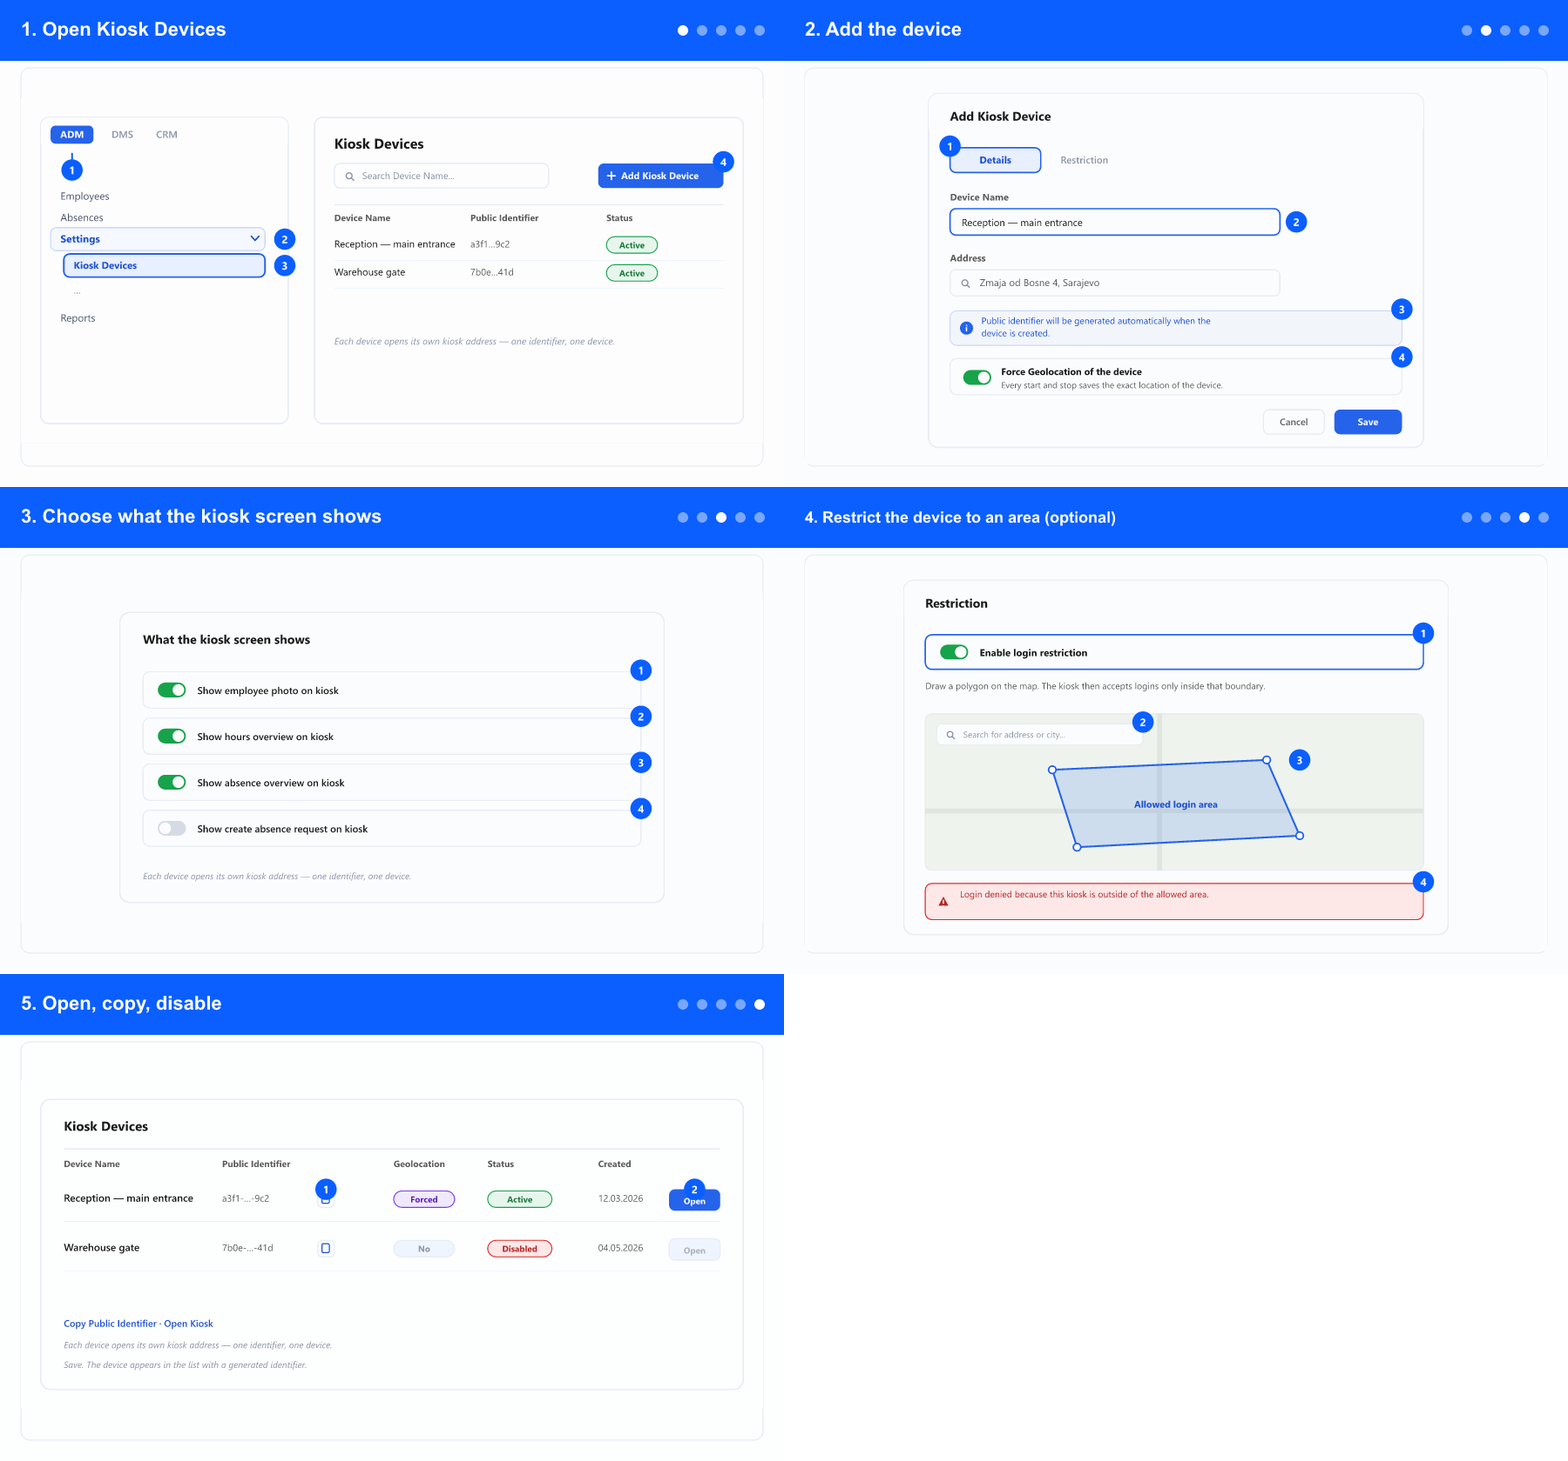
1. Open Kiosk Devices
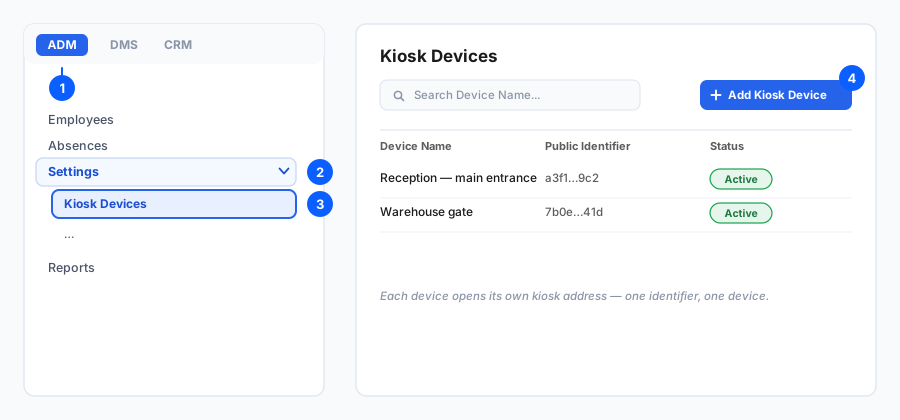
- In the left menu, open the ADM tab and expand Settings. The tabs (ADM / DMS / CRM / ATS) appear only when your company uses more than one module.
- Select Kiosk Devices. The list shows every kiosk registered for your company.
- Don't see it? This screen needs the kiosk feature enabled and an administrator-level permission — ask a company administrator.
- Register one device per physical screen. Two entrances that both need a kiosk are two devices, not one shared entry — that is what lets you tell later where a person clocked in.
2. Add the device
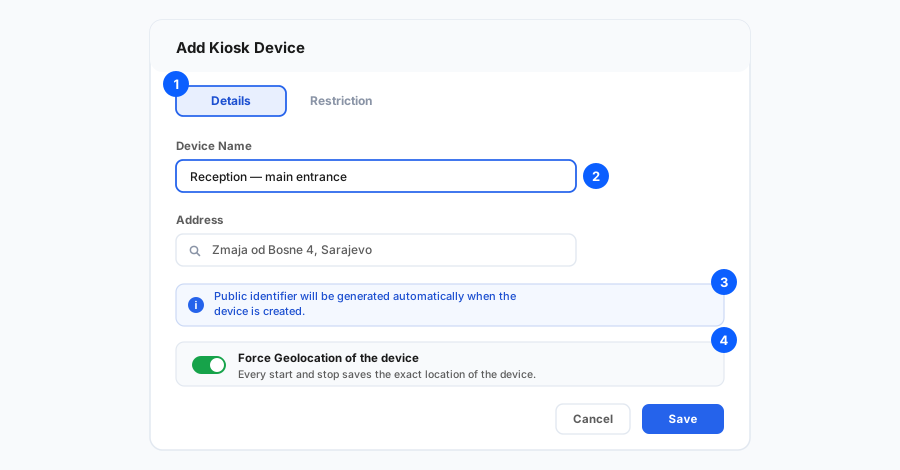
- Click Add Kiosk Device. The dialog opens on the Details tab.
- Enter a Device Name. Name it after the place, not the hardware — "Reception — main entrance" tells you something six months later; "Tablet 2" does not.
- Optionally set an Address. Start typing and pick from the suggestions; it is used as the device's location label.
- You do not type the Public Identifier. It is generated when the device is saved, and it is what makes the kiosk address unguessable.
- Turn on Force Geolocation of the device if you want every start and stop to record the exact position the device was in. That is what makes the live map view on the dashboard useful.
- Save. The device appears in the list with its generated identifier.
3. Choose what the kiosk screen shows
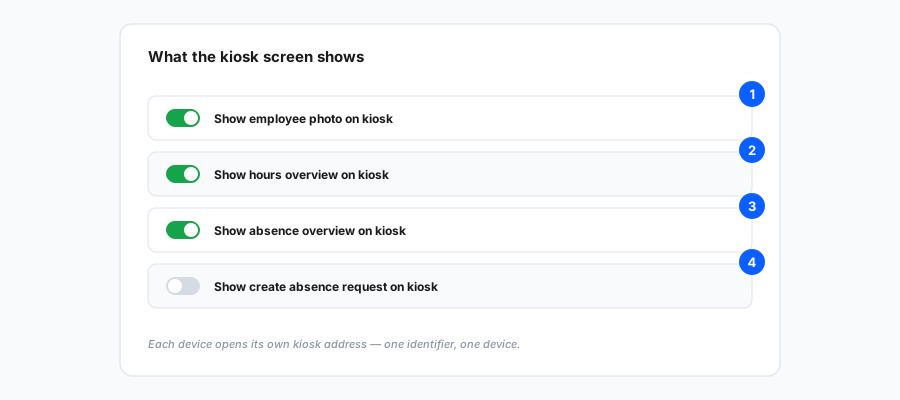
- Show employee photo on kiosk puts the person's profile photo on screen after they enter their PIN. It is the cheapest protection against someone using another person's PIN, because a colleague standing nearby sees the wrong face.
- Show hours overview on kiosk lets the person see today's entries and totals without a computer.
- Show absence overview on kiosk adds their vacation balance and absence history.
- Show create absence request on kiosk lets them file a request from the kiosk. Think before enabling it on a screen in a busy corridor — the person behind them sees it too.
- These are per device. A reception tablet used by office staff and a gate terminal in the yard can legitimately show different things.
4. Restrict the device to an area (optional)
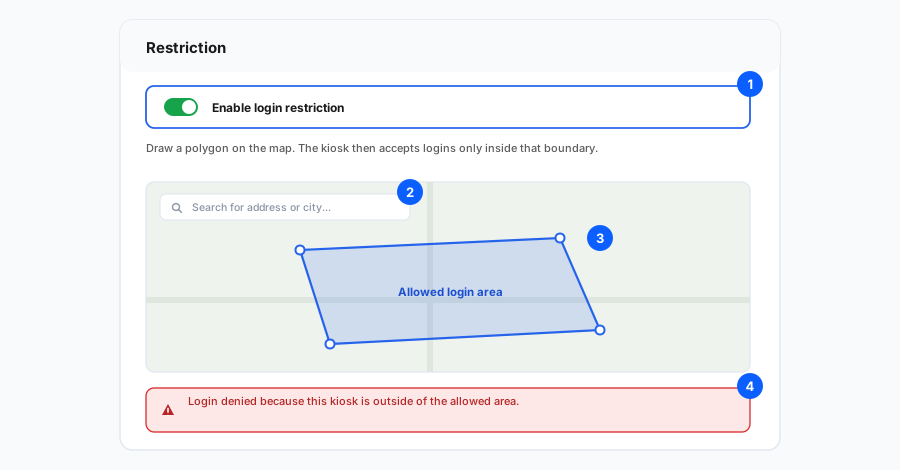
- Open the Restriction tab and turn on Enable login restriction.
- Find the location using the address search, then draw a polygon around the area where clocking in is allowed.
- Save. From then on the kiosk accepts a login only inside that boundary; outside it the person is told the kiosk is outside the allowed area.
- You cannot save the restriction without an area drawn — an enabled restriction with no polygon would block everyone.
- Draw the area a little generously. A polygon traced exactly along the building walls will reject people standing at the door, because phone and tablet positioning is accurate to metres, not centimetres.
- This restriction is about the device. The equivalent restriction for the mobile app is set per employee — see the mobile kiosk guide.
5. Open, copy, disable
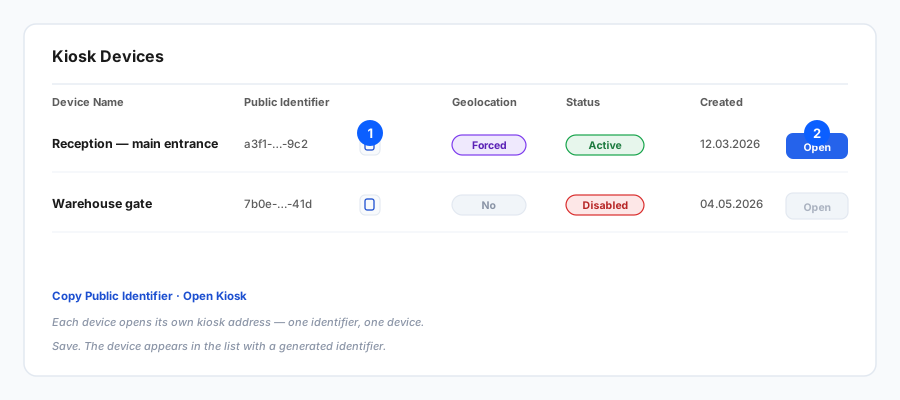
- Open Kiosk opens that device's kiosk screen. Do this once on the tablet itself, then leave the browser on that page — the identifier is in the address, so the tablet always comes back to its own kiosk.
- Copy Public Identifier puts the identifier on the clipboard, which is the easy way to set the device up remotely instead of typing it.
- Treat the identifier as a key. Anyone with the address reaches that kiosk's PIN screen — they still need a valid PIN, but do not publish the link.
- Set a device to Disabled instead of deleting it when a terminal is out of service. Its history stays intact and the kiosk itself refuses logins with a clear message.
- Edit any device to change its name, its toggles or its area. Existing clocked hours are not affected.
A kiosk device is not a user account. Nobody logs into the application through it — employees identify themselves with a PIN, which is issued separately. See Clocking in at a kiosk for issuing PINs, using the screen, and the administrator's live dashboard.
Related: Clocking in at a kiosk and the kiosk dashboard · The mobile kiosk · Entering hours · Creating a user account.