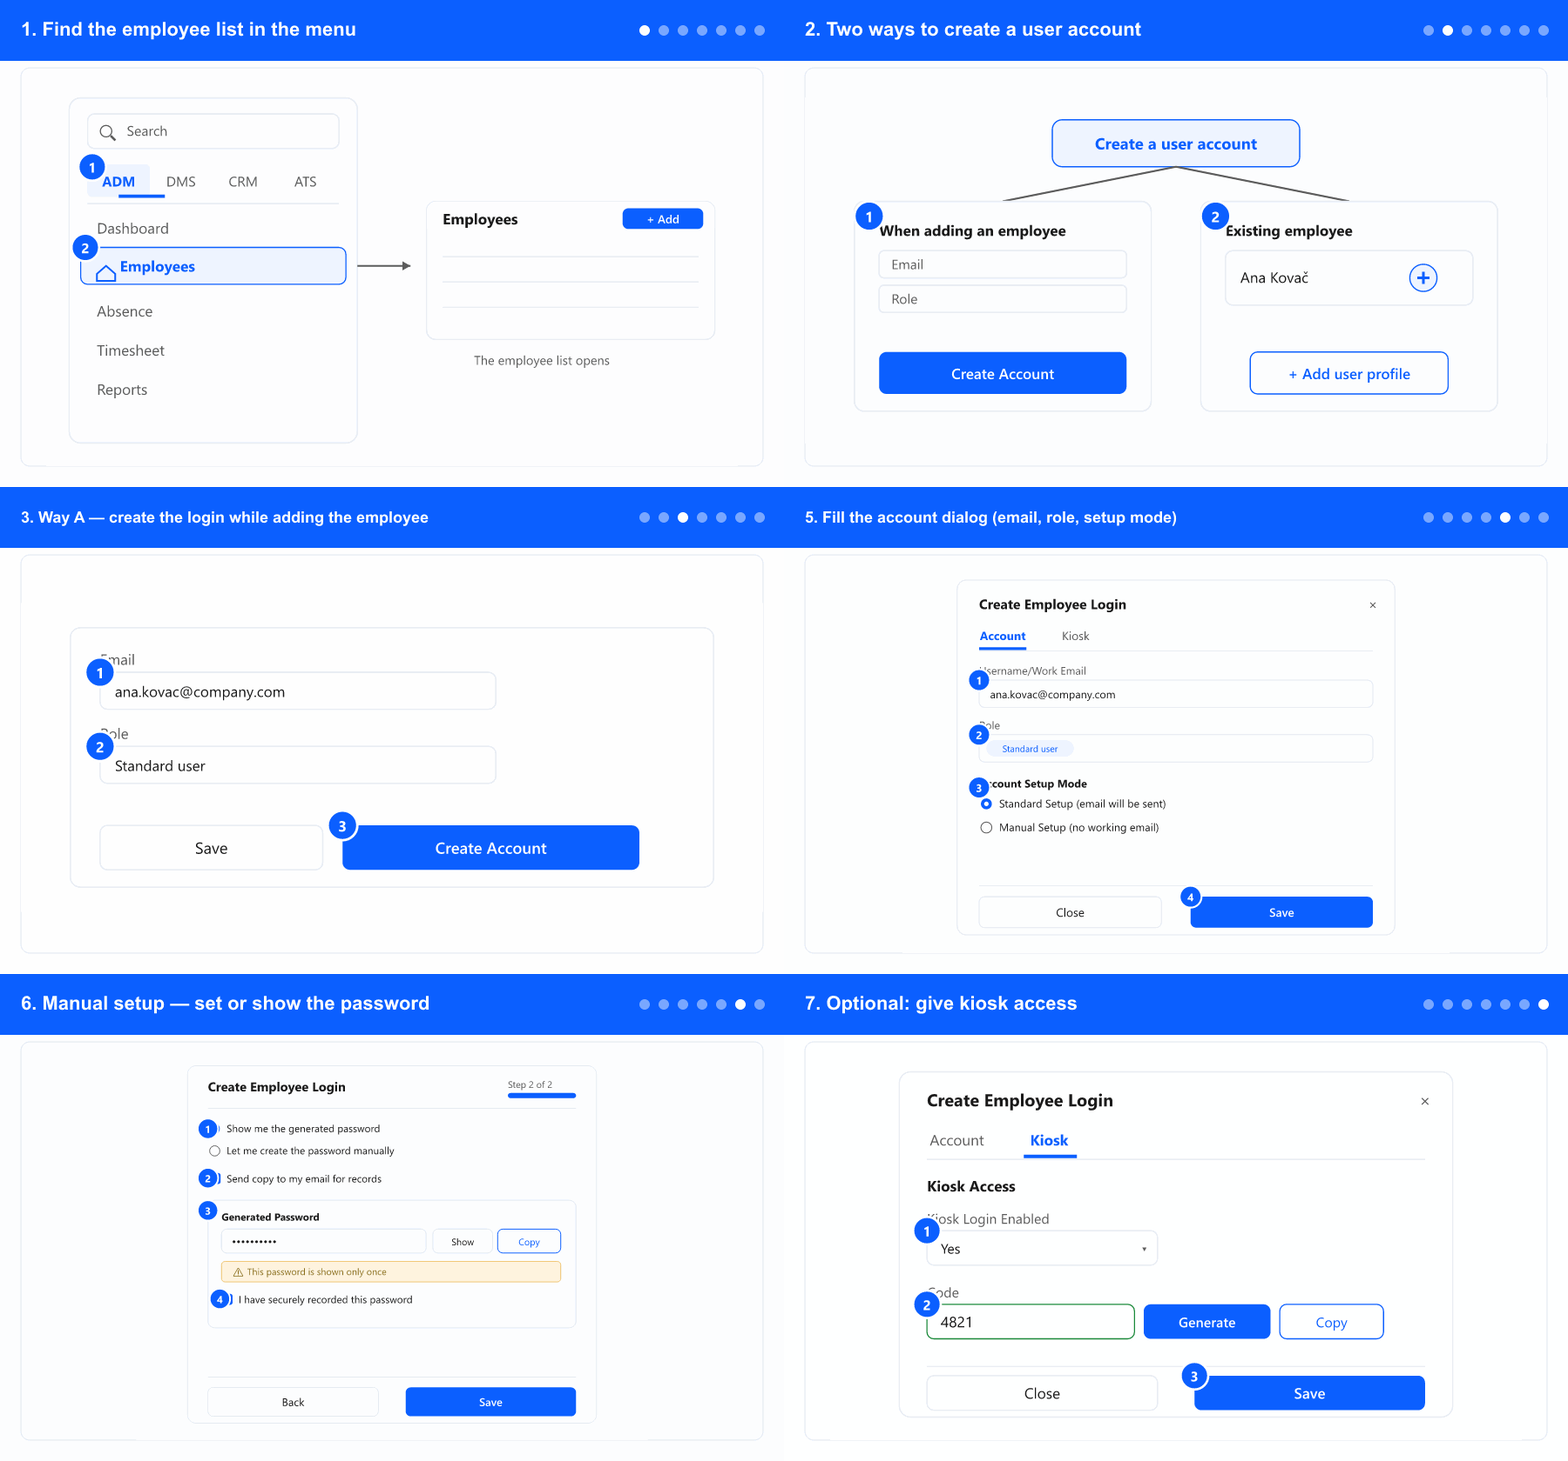
1. Find the employee list in the menu
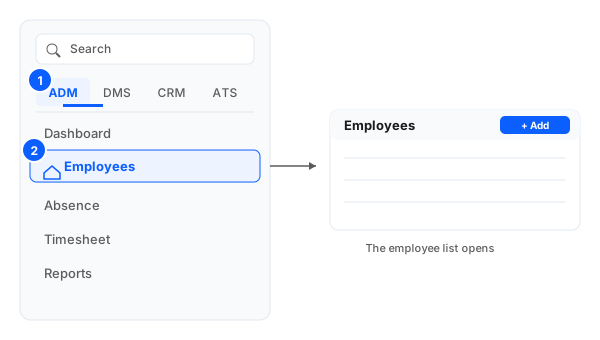
- In the left menu, open the ADM tab. The tabs (ADM / DMS / CRM / ATS) only appear when your company uses more than one module — if you have a single module, the menu items are shown directly, so skip to the next step.
- Select Employees. The employee list opens. Tip: you can also type Employees in the menu search box at the top.
- Don't see Employees? It needs the HR module and the right permission — ask a company administrator.
2. Two ways to create a user account
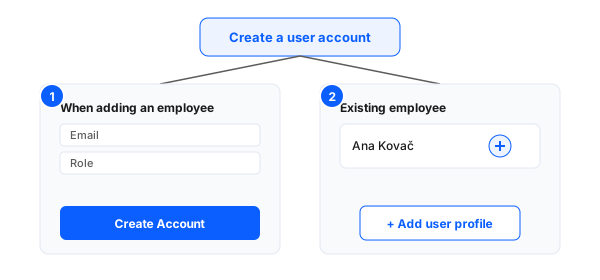
- Way A — at the same time as the employee: while filling the Add employee form, finish with Create Account instead of Save (see step 3).
- Way B — later, for an employee already in the list: open the account action on the employee's row in the list (see step 4).
The employee record and the login are separate. An employee can exist with no account; you can always add one later. For many people without a work e-mail at once, see Create login credentials for many employees at once.
3. Way A — create the login while adding the employee
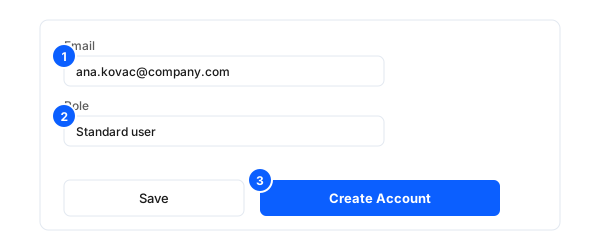
- Fill the Add employee form, then enter the Email — it becomes the sign-in username.
- Pick exactly one Role (the permission level). The level decides what the person can do in the system: Employee has access only to their own profile and can submit absence requests; Manager has everything an employee has, plus the ability to see and approve absences for the people on their team. Your company can also have custom permission levels. If you pick more than one, the form asks you to choose just one.
- Click Create Account. This creates the employee and the login. (Clicking Save instead creates the employee only, with no login.)
4. Way B — add a login to an existing employee
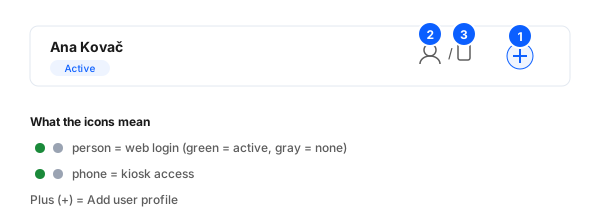
- Find the employee in the list. On their row, in the actions column, look at the account icons: the person icon is the web login (green = account active, gray = no account or disabled) and the phone icon is kiosk access (green = enabled, gray = not). A plus (+) appears when the employee has neither an email nor kiosk access yet.
- Click the Add user profile (plus) action to create a login. If the person already shows a gray person icon, clicking it opens the same add-account dialog.
- Don't see the action? Adding accounts needs the right permission — ask a company administrator.
5. Fill in the fields the system requires (email, role, setup mode)
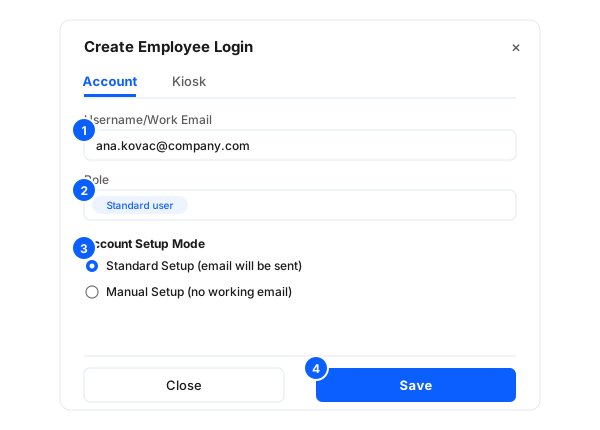
- On the Account tab, enter the Username/Work Email (the sign-in name) and pick the Role(s).
- Choose the Account Setup Mode: Standard Setup (email will be sent) generates a password and emails the sign-in details to the employee at the email address you assigned them. Click Save to finish.
- Use Manual Setup (for employees without a working email) when the address cannot receive mail. It is used most often for the mobile kiosk, where an inactive email address is entered — in that case the administrator passes the sign-in details to the employee themselves. Continue to step 6.
6. Manual setup — set or show the password
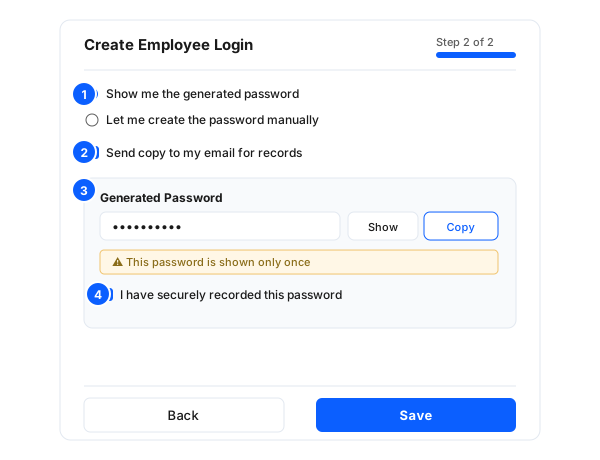
- Pick how to set the password: Show me the generated password, or Let me create the password manually (a strength meter and requirements appear as you type).
- Optionally tick Send copy to my email for records and enter an admin email.
- If generated, reveal it with Show and Copy it — it is shown only once.
- Tick I have securely recorded this password, then click Save. Hand the password to the employee through a secure channel (in person, phone, or internal chat).
7. Optional: give kiosk access
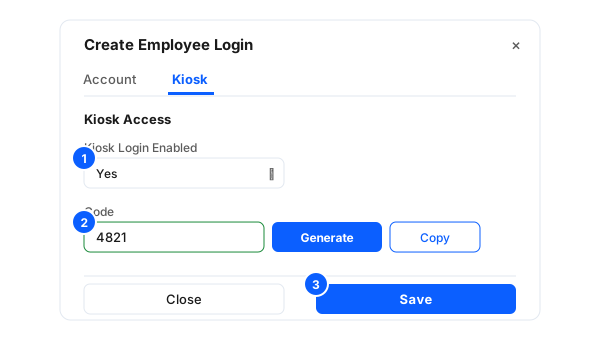
- Switch to the Kiosk tab and set Kiosk Login Enabled to Yes if the person signs in at a kiosk device.
- Enter a 4–6 digit Code, or click Generate, then Copy it for the employee.
- Click Save. Kiosk access is separate from the web login — you can set either, or both.
8. Edit accounts or reset passwords
- To change an existing account (enable/disable login, two-factor, roles) or to reset a password, open the green person icon on the employee's row (Open user profile).
- The full steps for editing accounts and resetting passwords are in Employee records and user accounts.