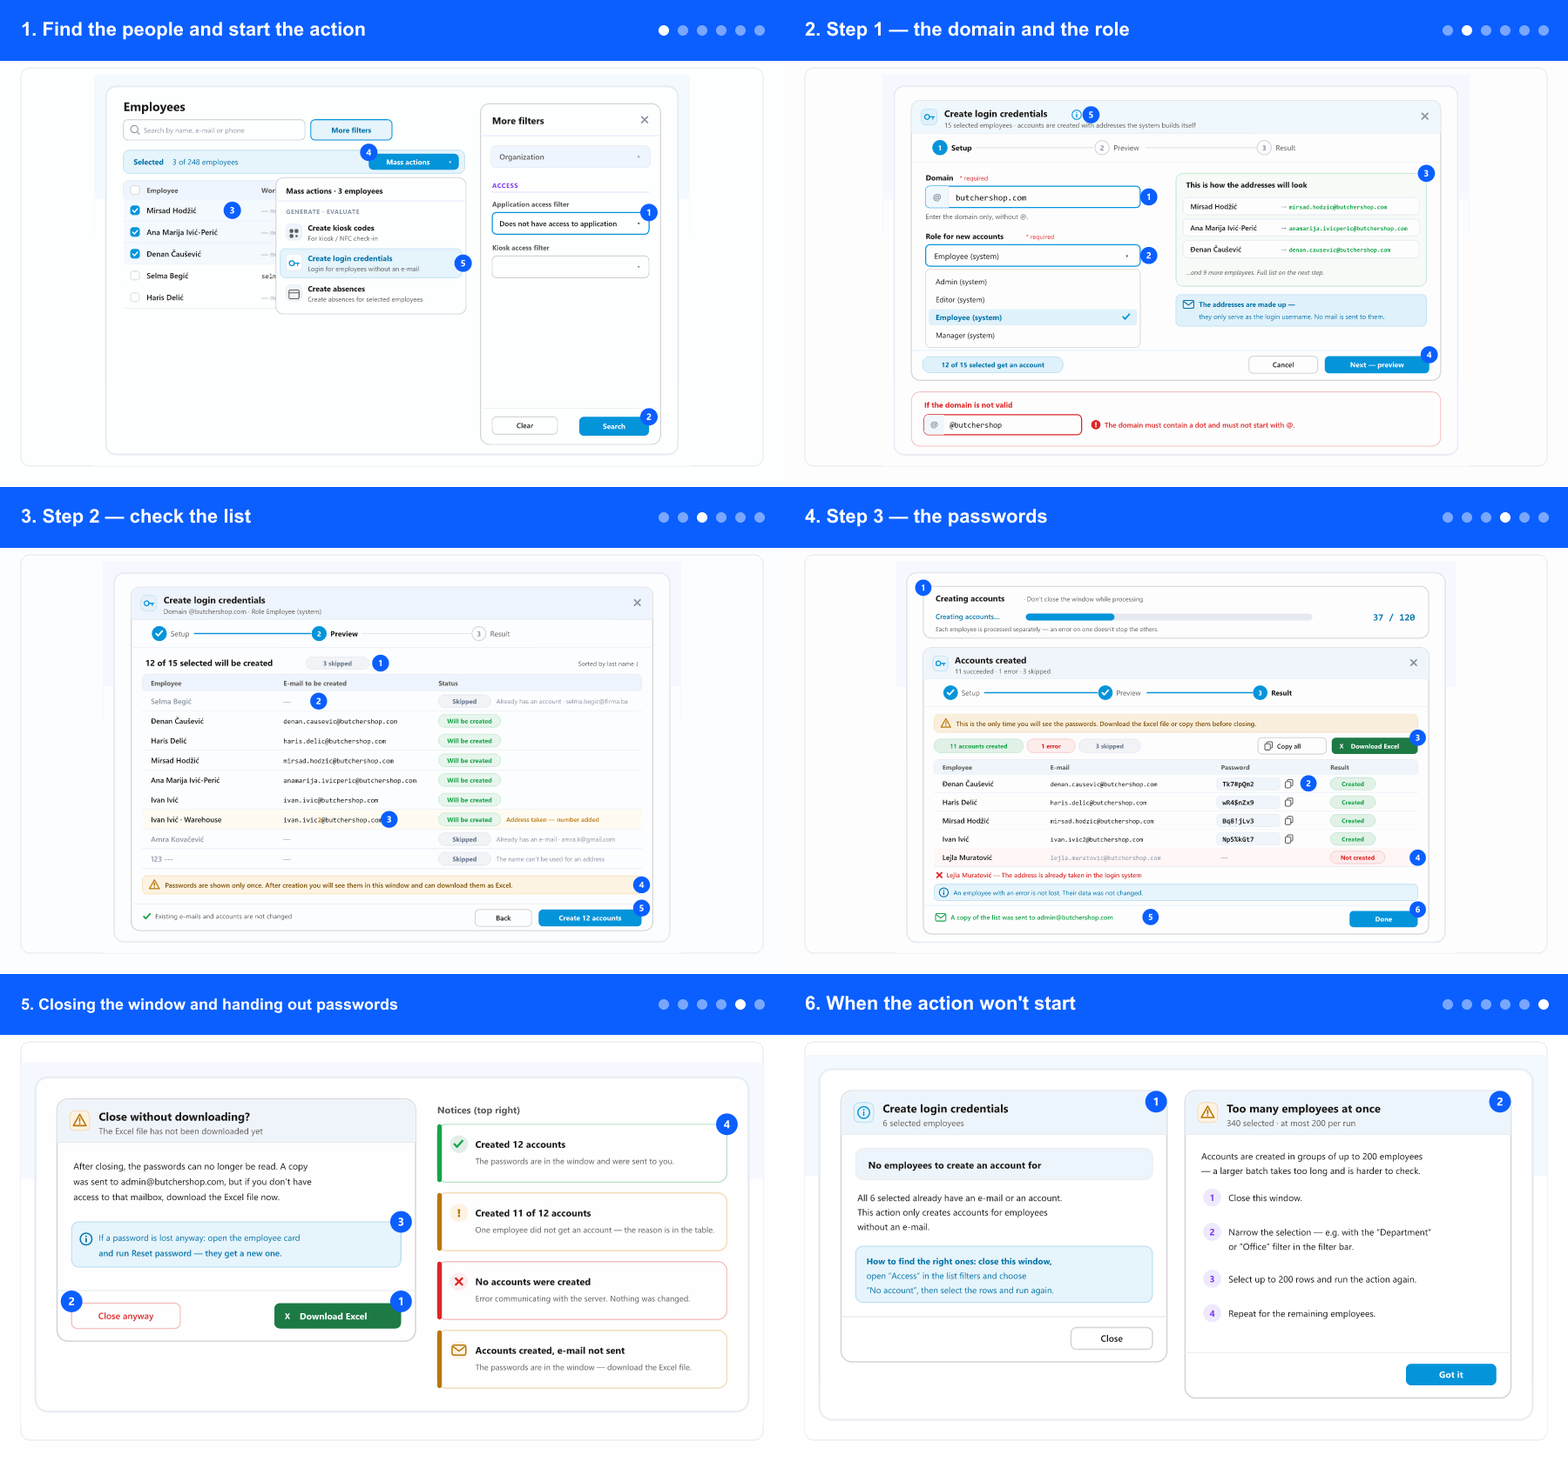
1. Find the people and start the action
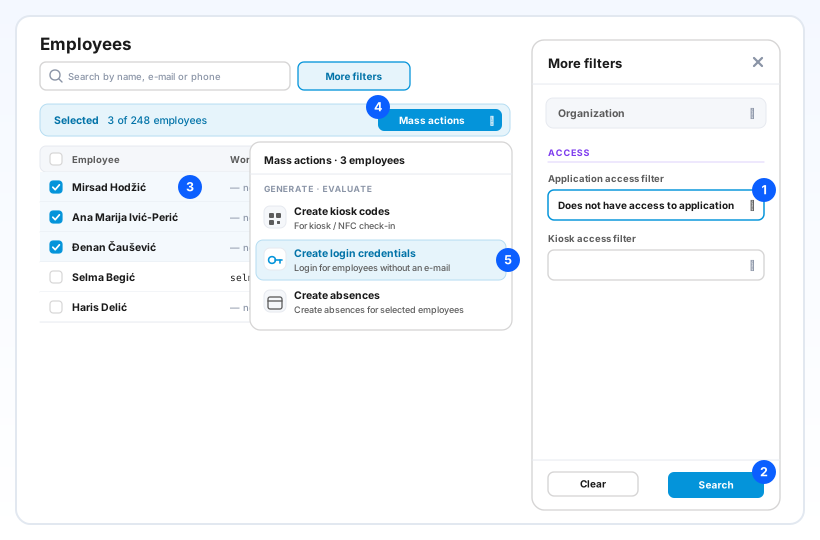
In the left menu, open the ADM tab (if the tab strip is shown) and select Employees. Then click More filters.
- In the Access section, set Application access filter to Does not have access to application. This step is optional — people who already have an e-mail or an account are skipped anyway — but it keeps the list to the people you actually mean. To narrow further, add a department or office filter.
- Click Search. The list now shows only the matching people.
- Tick the rows you want. The checkbox in the column header ticks every row on the current page.
- In the selection bar above the list, click Mass actions.
- Under Generate · evaluate, choose Create login credentials (Login for employees without an e-mail). The window opens on its first step, Setup.
2. Step 1 — the domain and the role
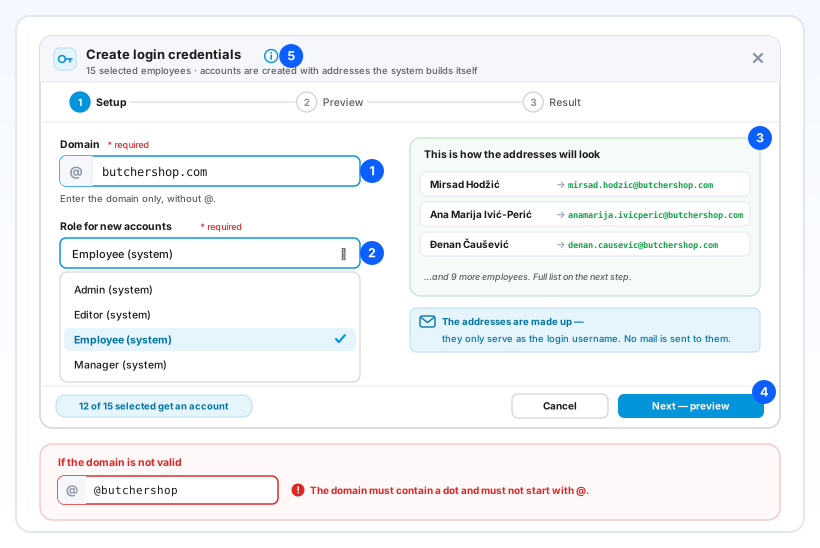
- In Domain, type only the domain — for example butchershop.com. The @ is already part of the field. Capital letters and spaces are corrected by themselves. The domain does not have to be real, because no mail is sent to these addresses. If it has no dot or starts with @, the field turns red and says so.
- In Role for new accounts, pick the role every account in this run gets. There is no pre-selected role on purpose. Only the system roles are offered, and the list can be searched. For a different role, run the action again for those people.
- As soon as the domain is valid, This is how the addresses will look shows the first three addresses. Letters are lower-cased, č, ć → c, š → s, ž → z, đ → d, dž → dz, and spaces, hyphens and apostrophes are dropped — Ana Marija Ivić-Perić becomes anamarija.ivicperic.
- The footer says how many of the selected get an account (12 of 15 selected get an account). Next — preview becomes active once both the domain and the role are set.
- The info icons next to the title, the domain and the role open What are "placeholder" e-mails? — five short steps explaining the idea. Closing it keeps what you entered.
3. Step 2 — check the list
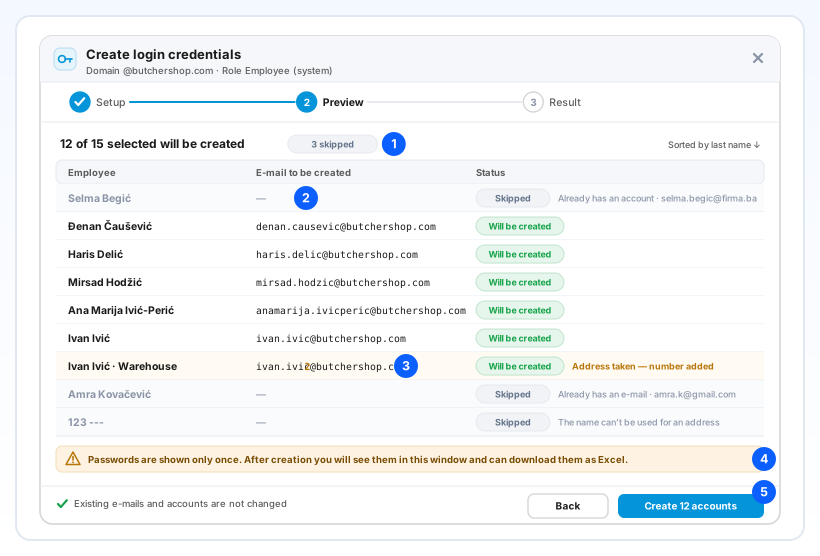
- The top line says how many accounts will be created and how many people are skipped (12 of 15 selected will be created · 3 skipped). The list is sorted by last name.
- Everyone you selected is in the list. People the action will not touch are greyed out as Skipped, with the reason: Already has an account or Already has an e-mail (with the address they have), The name can't be used for an address, or Not available for this action.
- If an address is already in use — by a colleague with the same name or anywhere in the sign-in system — a number is added at the end (ivan.ivic2@…) and the row says Address taken — number added.
- Read the yellow warning: passwords are shown only once. After the window is closed they can only be reset, one employee at a time.
- Back returns to step 1 with the domain and role kept; a new domain recalculates the addresses. Create 12 accounts (the number follows your list) starts creating them — there is no further confirmation.
4. Step 3 — the passwords
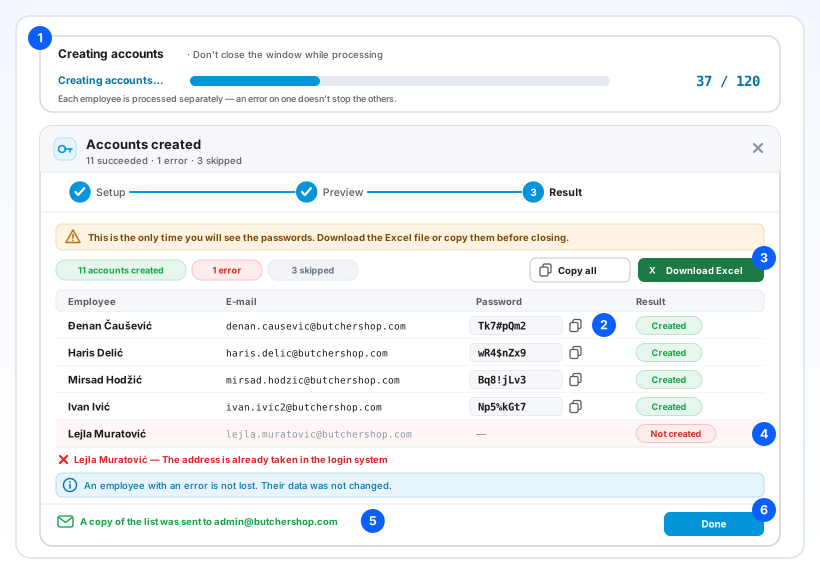
- While Creating accounts runs, a counter shows the progress (37 / 120). Don't close the window until it finishes. Each employee is handled on their own, so a problem with one doesn't stop the others.
- Every new account is listed with its E-mail and Password. The copy icon next to a password copies just that one — handy when a supervisor needs a single login.
- Copy all copies name, e-mail and password for every created account (it pastes straight into Excel). Download Excel saves the list as a file with the sheet Login credentials.
- A row that failed is red, Not created, with the reason — for example The address is already taken in the login system. That employee's data was not changed: tick them on the list again later and run the action, for instance with another domain.
- The footer confirms A copy of the list was sent to your e-mail. Nothing is ever sent to the made-up addresses.
- Click Done when you have what you need.
5. Closing the window and handing out passwords
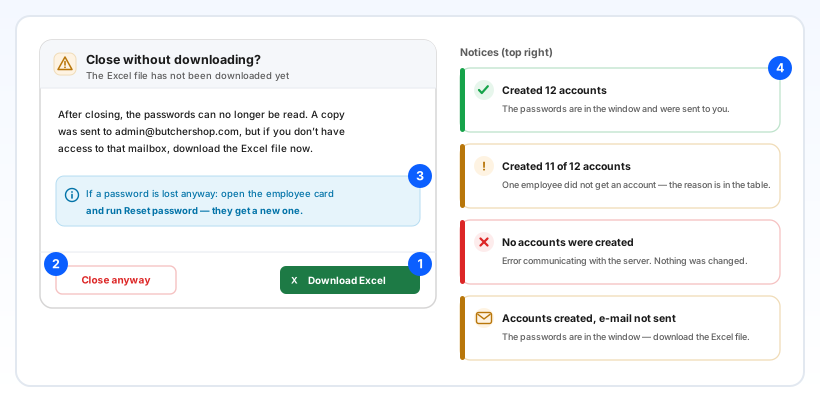
- If you click Done or ✕ before downloading the Excel file, Close without downloading? appears. Download Excel is the main button — use it.
- Close anyway closes the window. The passwords can no longer be read after that.
- If a password is lost anyway, open that employee's card and run Reset password — they get a new one (see Create a user account, step 8).
- Notices appear at the top right: green when every account was created, yellow when some were not (the reasons are in the table), red when none were created (nothing was changed — try again), and Accounts created, e-mail not sent — then the window is your only copy, so download the Excel file before closing.
- After closing, the selection on the list is cleared and the list reloads; the new accounts no longer appear under Does not have access to application.
- Hand each password to the employee in person, and delete the e-mail copy once it is no longer needed. Closing the window before creating anything (steps 1–2) needs no confirmation and changes nothing.
6. When the action won't start
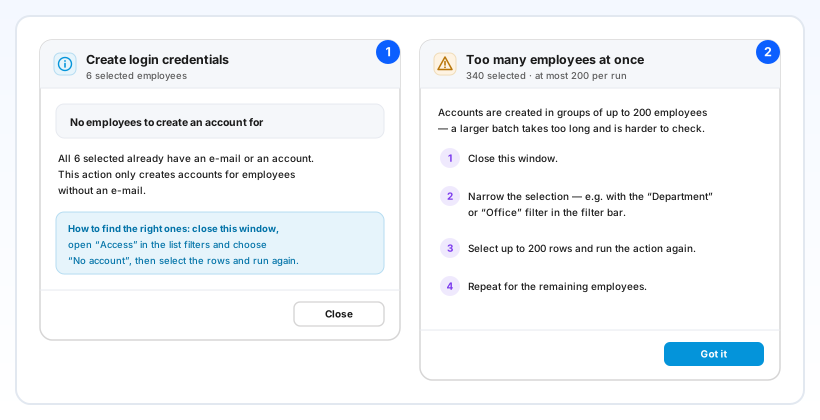
- No employees to create an account for — everyone you selected already has an e-mail or an account. Close the window and filter the list as in section 1. The message calls the filter Access → No account; in the filter panel it is Application access filter → Does not have access to application.
- Too many employees at once — one run takes at most 200 people. Click Got it, narrow the list (for example by department or office), tick up to 200 and run the action; repeat for the rest.
The action is offered to users who may add employees. It creates accounts only for people without a work e-mail — an employee with a real business address gets an account from their own card, on that address. Everyone in one run gets the same role. There is no forced password change at the first sign-in, so hand passwords over personally.
Related: What's new: accounts for the whole shop floor in one go · Create a user account (one person) · The employee list.