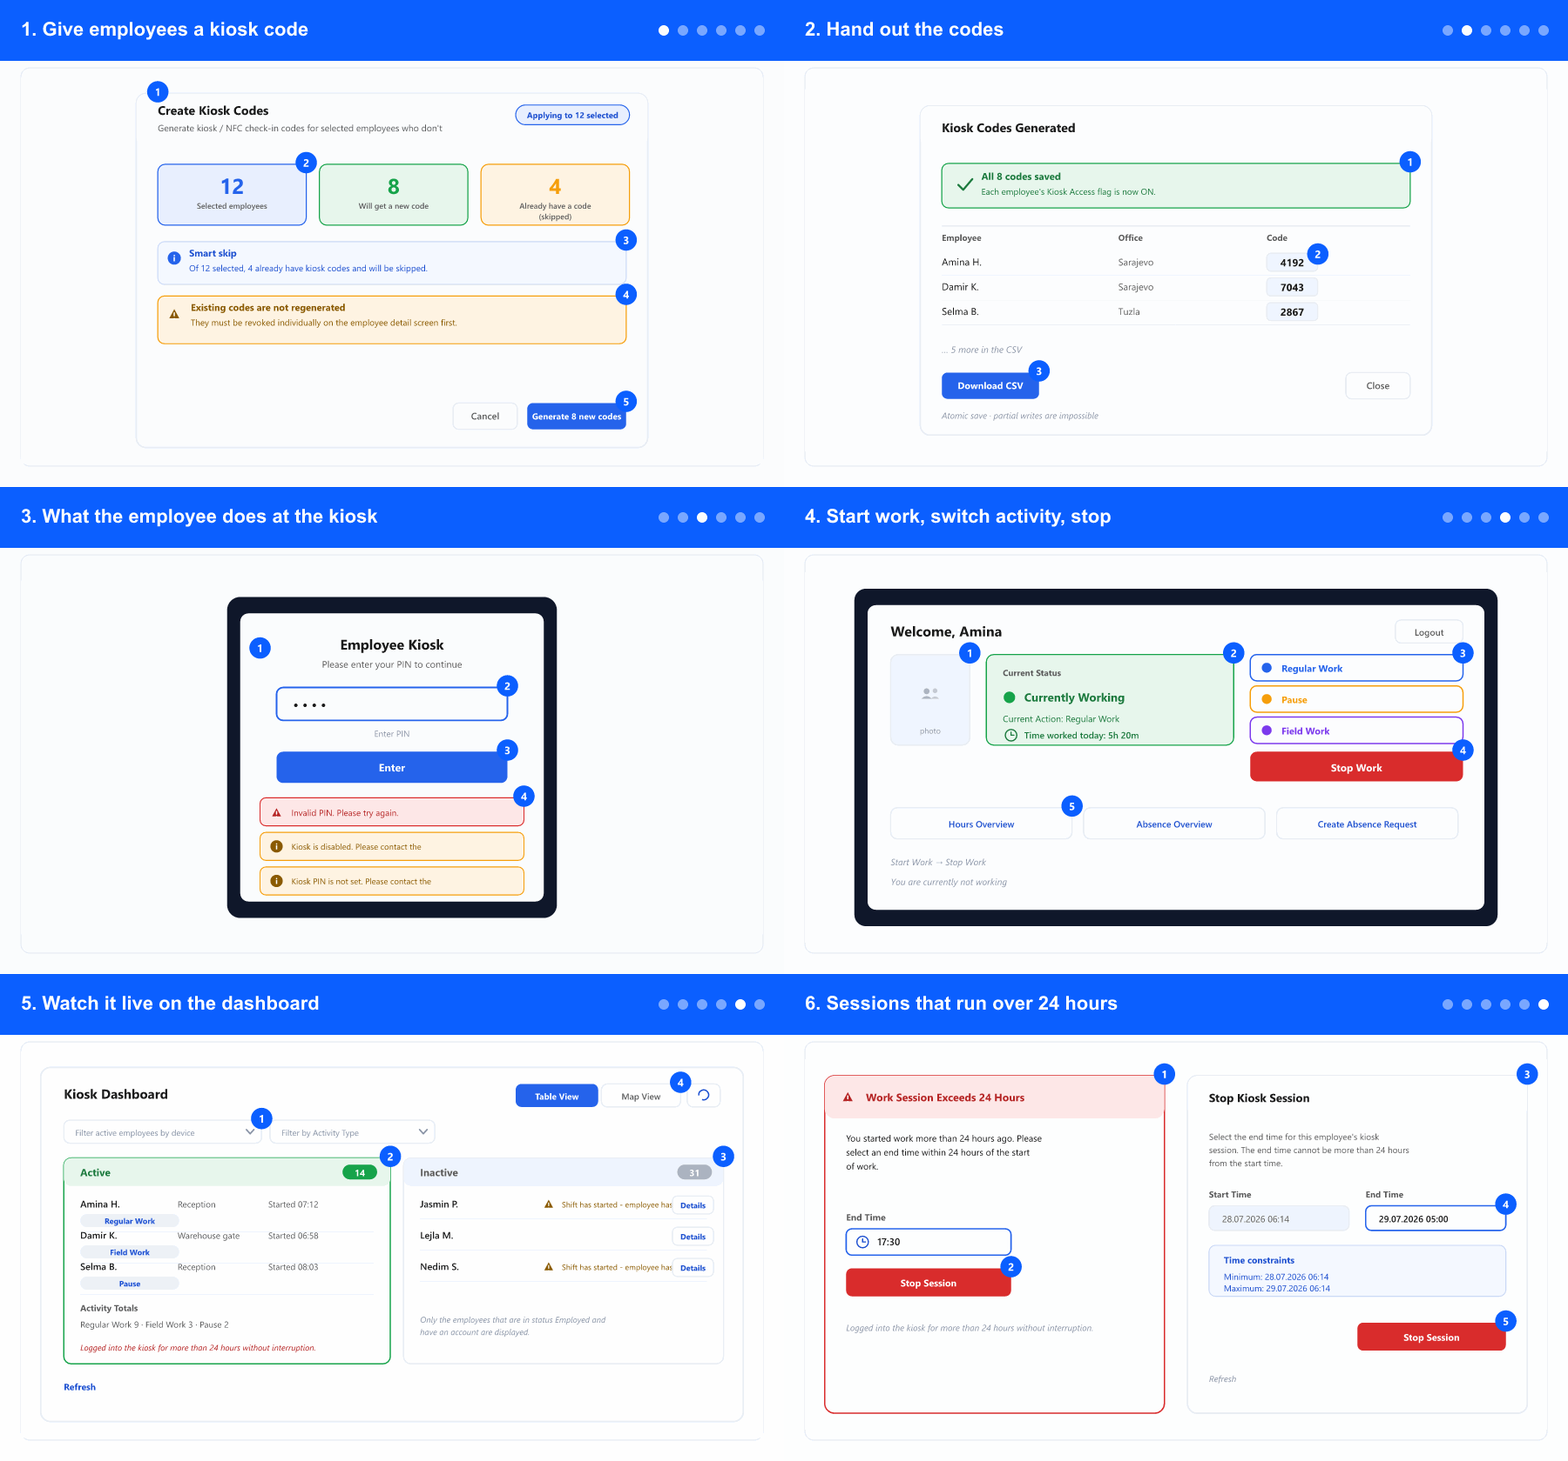
1. Give employees a kiosk code
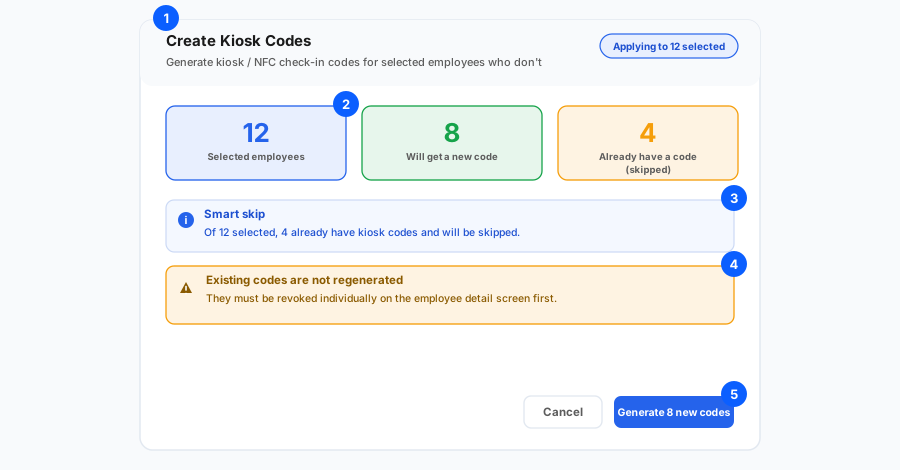
- Open Employees, tick the people who need kiosk access, and choose Create Kiosk Codes from the mass actions.
- The dialog counts three things before doing anything: how many you selected, how many will get a new code, and how many are skipped because they already have one.
- Read the amber warning once and remember it: existing codes are never regenerated by this action. To give someone a new PIN, revoke the old one on their record first.
- That is also why re-running the action is safe. Nobody gets a duplicate code, and nobody's working PIN silently changes under them.
- Click generate. The whole batch is written in one database transaction, so a half-finished run is not possible.
- For a single person, you don't need the mass action — kiosk access is on the employee's own record, next to their user account.
2. Hand out the codes
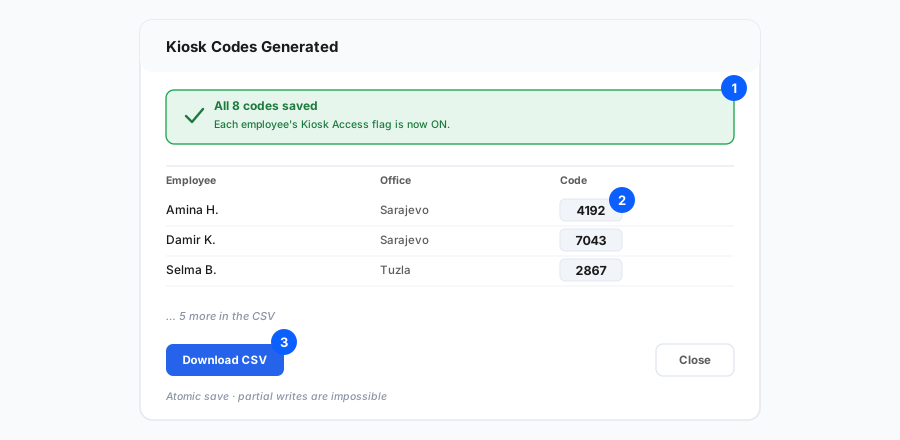
- The result screen lists the batch and confirms that each person's kiosk access is now on.
- Download CSV is the practical way to distribute them — one file to print or split per office, instead of copying codes one at a time.
- Closing the dialog loses nothing. Every code stays visible on that employee's own record until it is revoked.
- Treat the CSV like a list of passwords: it is exactly that. Deliver each person their own code, not the whole file.
- If some rows report as failed, just run the action again for those people. Concurrent edits are the usual cause.
3. What the employee does at the kiosk
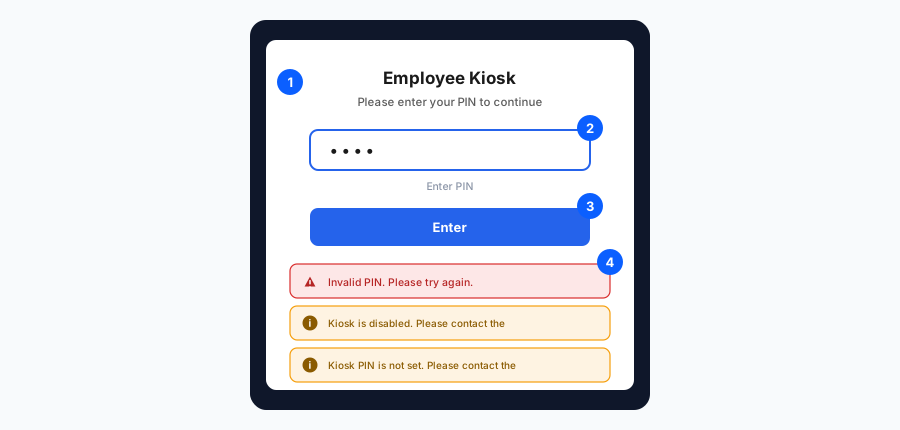
- The tablet stays on the kiosk page. The employee types their PIN and confirms — no username, no application login.
- "Invalid PIN" means the code is wrong, not that the person has no access. A digit mistyped is by far the most common cause.
- "Kiosk is disabled" is about the device, not the person — an administrator has switched that terminal off.
- "Kiosk PIN is not set" means that employee never got a code. Generate one as in step 1.
- If the device has a login area drawn, a login from outside it is refused with a message saying so — see the setup guide.
4. Start work, switch activity, stop
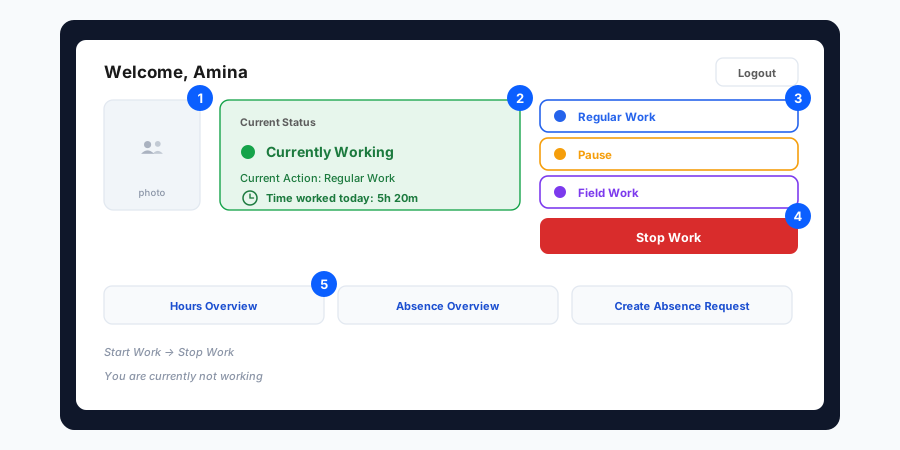
- After the PIN, the screen shows who is signed in — with their photo, if the device is configured to show it.
- The status panel is the important part: it says whether the person is currently working, which activity is running, and how much time is logged today.
- Start work by choosing the activity — regular work, a break, field work, and whatever else your company defines as hour types. That is what makes the totals meaningful later.
- Switching activity does not need a stop first. Choosing a different one closes the previous stretch and opens the new one, so a break is a switch, not a logout.
- Stop Work ends the session. Whether the employee also sees hours, absences or a request form depends on the per-device toggles.
- Everything logged here lands in the ordinary timesheet, so nothing needs re-entering — see Entering hours.
5. Watch it live on the dashboard
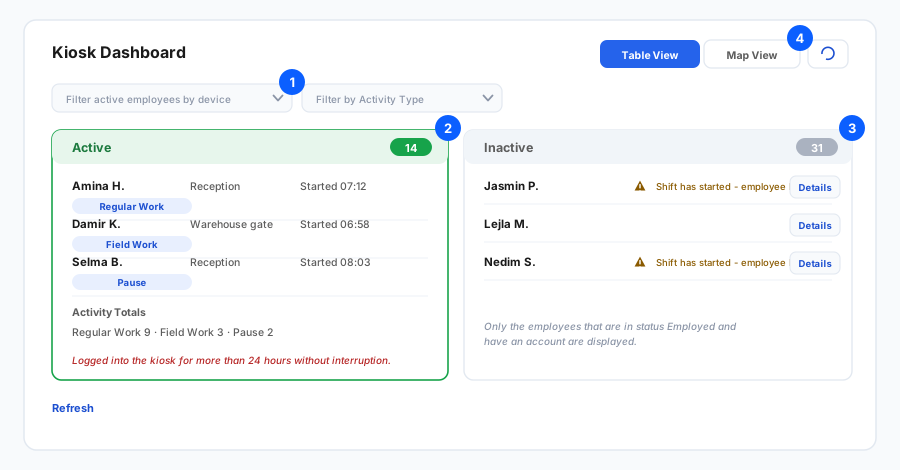
- Open Kiosk Dashboard under Reports. It shows, right now, who is clocked in and who is not.
- The Active column lists each person with the device they used, when they started, and the activity they are on. Activity Totals summarises the whole company at a glance.
- The Inactive column is the one that saves time. An amber warning appears only when a shift has started, the person has no absence, and no hours are logged — in other words, when it is genuinely worth a phone call.
- Details on an inactive row compares the planned shift with the logged hours and states which of the situations it is: no shift and no hours, hours without a shift, a shift with nobody clocked in, hours outside the shift, or a planned absence.
- Filter by device to see one entrance at a time, or by activity type to find everyone currently on a break.
- Map View plots where people clocked in — but only for devices where geolocation is forced. Without that, there is nothing to plot.
- Only employees with status Employed who have an account appear. Someone missing from both columns usually fails one of those two conditions.
6. Sessions that run over 24 hours
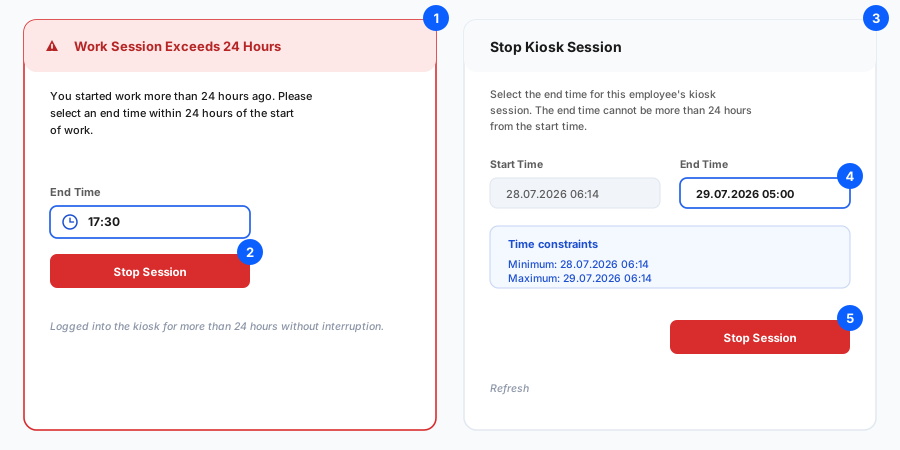
- Forgetting to clock out is the classic kiosk problem. The system refuses to record a session longer than 24 hours rather than silently storing nonsense.
- When the person next uses the kiosk, they are told the session has run over 24 hours and asked to pick when work actually ended.
- An administrator can close it from the dashboard instead: Stop Session shows the start time and asks for an end time.
- The dialog states the minimum and maximum it will accept — after the start, and no more than 24 hours later. Anything else is rejected.
- Fix these the same day. A session left open blocks the person's next clock-in and distorts every total that includes it.
- The dashboard also flags anyone logged in for more than 24 hours without interruption, so these do not have to be hunted for.
A kiosk PIN is not a password and grants no access to the application. A person can have a kiosk code with no user account at all — which is exactly the point for staff who never sit at a computer.
Related: Setting up a kiosk device · The mobile kiosk · Entering hours · Shift planning · Creating a user account.