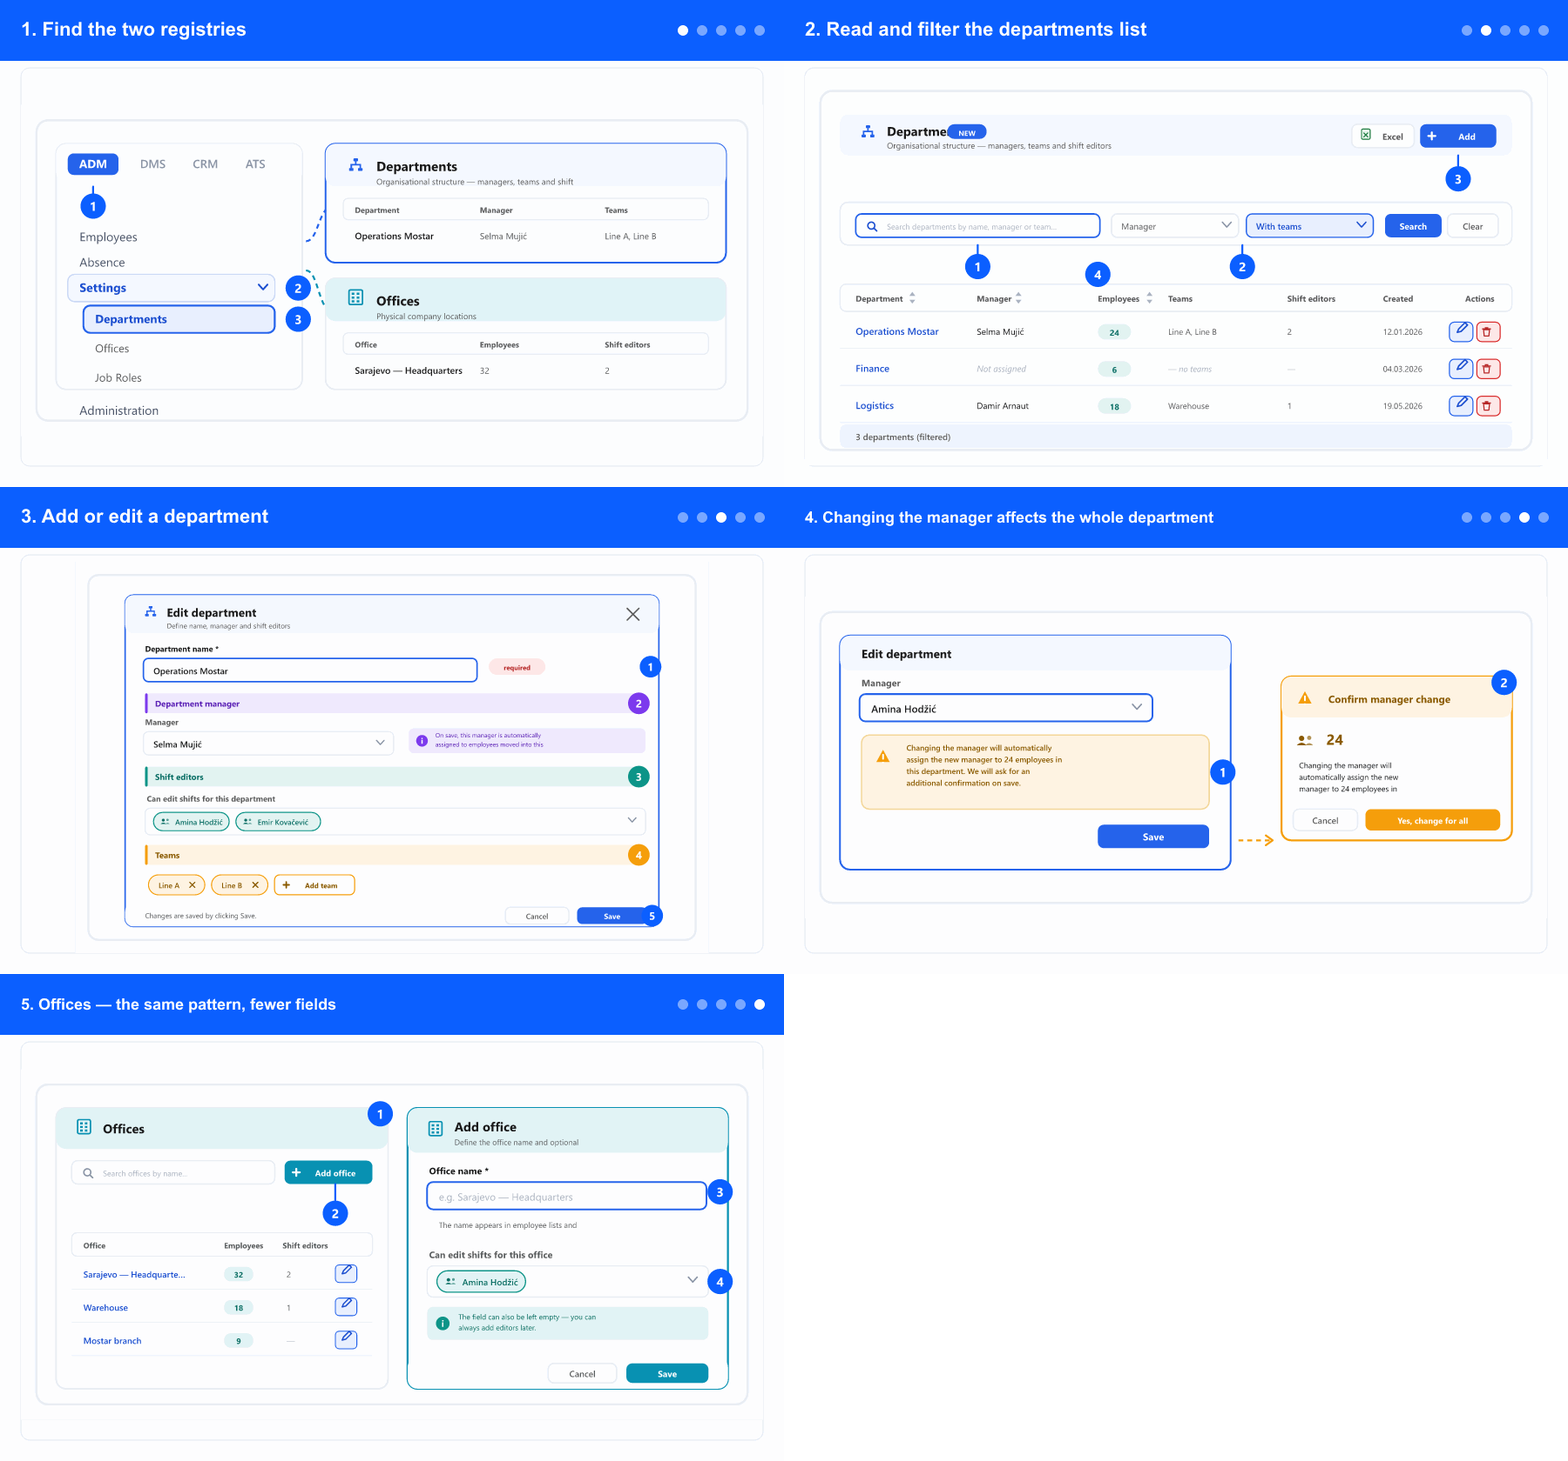
1. Find the two registries
- In the left menu, open the ADM tab. The tabs (ADM / DMS / CRM / ATS) appear only when your company uses more than one module.
- Expand Settings. This group holds the company's registries — the lists the rest of the app picks from.
- Select Departments or Offices. They are neighbours in the menu because you normally set them up in one sitting.
- Set these up before adding a lot of employees. Both are dropdowns on the employee record, and filling them in later means editing every record again.
2. Read and filter the departments list
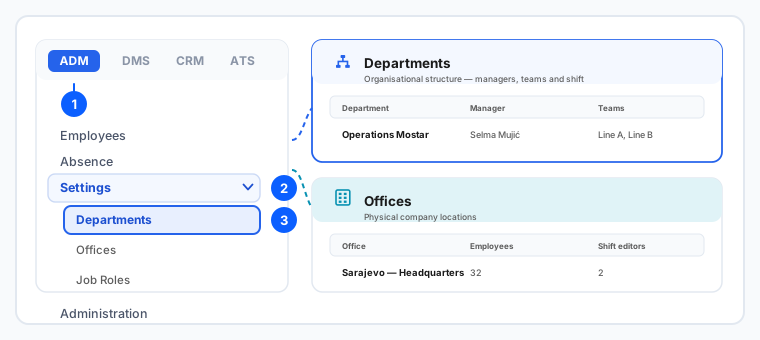
- The list shows each department with its Manager, the number of Employees, its Teams, its Shift editors and when it was Created.
- Read it as a checklist: Not assigned in the Manager column and — no teams in the Teams column are the gaps worth closing, because a department without a manager means absence requests fall through to the company administrator.
- Search matches name, manager or team — so you can find a department by the team inside it, not just by its own name.
- Filter by Manager to see one person's departments, or by Has teams to list the ones you have not organised into teams yet.
- Press Search to apply and Clear to reset. Excel exports the list you see.
- Sort by clicking a column header. The row count under the list says how many departments match and marks the view as (filtered) when a filter is on.
3. Add or edit a department
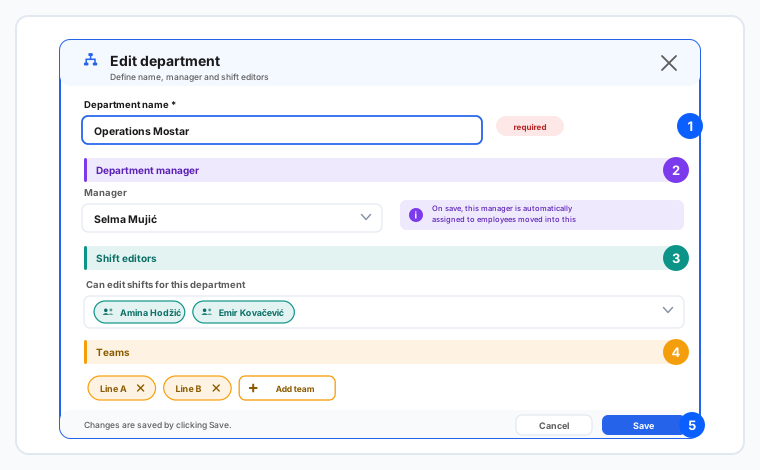
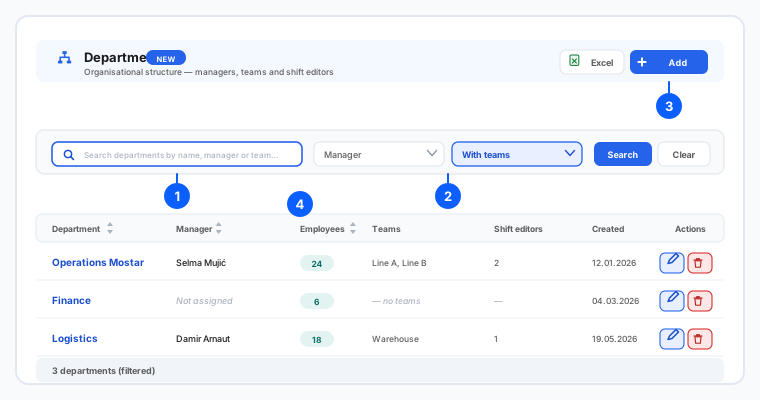
- Click Add department, or the pencil on a row to change an existing one. The same window opens either way.
- Enter the Department name — the only required field. Use the name people actually say out loud; it shows up in employee lists and every report.
- Pick the Manager. This is the person who approves absences for the department's employees when they have no approvers of their own, and who confirms their monthly shift plan.
- Under Shift editors, add anyone who may edit shifts for this department besides the manager. You can add several people, or leave it empty and come back later.
- In Teams, add the teams that belong to this department and remove any you no longer need. When you are creating a department you have to enter its name first — teams attach to a department that exists.
- Click Save. Unlike the employee record, this window does not save as you type — nothing is stored until you press Save.
4. Changing the manager affects the whole department
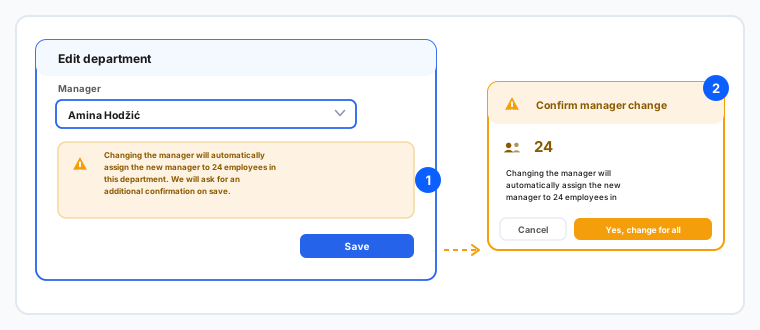
- Pick a different Manager on an existing department and a banner appears telling you how many employees will get the new manager.
- This is deliberate: the manager set here cascades to the department's employees, so one change can rewire approvals for dozens of people at once.
- When you press Save, a second dialog — Confirm manager change — asks again and repeats the number. Choose Yes, change for all only if that is what you intend.
- If you only meant to change the manager for one person, cancel here and set their manager on their own employee record instead.
- Note the difference: on a new department the manager is simply assigned to employees as they are moved in — there is nothing to cascade yet.
5. Offices — the same pattern, fewer fields
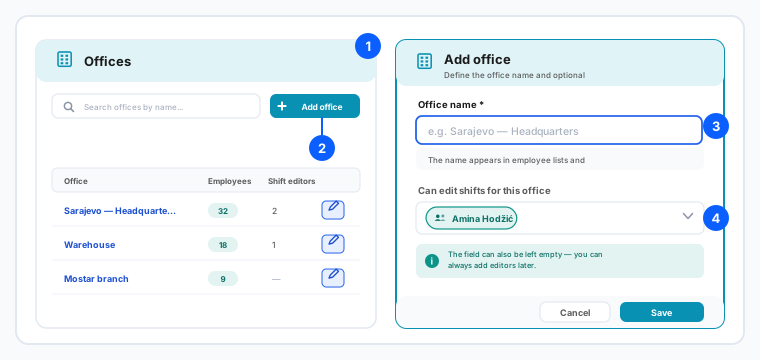
- Open Offices. The list shows each office with its number of Employees, its Shift editors and the created date.
- Search by name, or filter by Has shift editors to find offices nobody can plan shifts for yet.
- Click Add office and enter the Office name — the only required field. Include the place, for example Sarajevo — Headquarters, since the name appears in employee lists and reports where the context is not obvious.
- Under Can edit shifts for this office, add the people who may plan shifts there. Several are allowed and the field may stay empty.
- Click Save. An office has no manager and no teams — that structure lives on the department, not the location.
- Use both together: a person works in an office and belongs to a department. Someone can move office without changing department, and the other way round.
Both screens save only when you click Save. Deleting a registry entry that employees still use is refused — reassign those people first. The link back to the classic view exists for the transition period and is not needed for normal work.
Related: Fill in and change an employee's basic data · The employee list · Shift configurations.