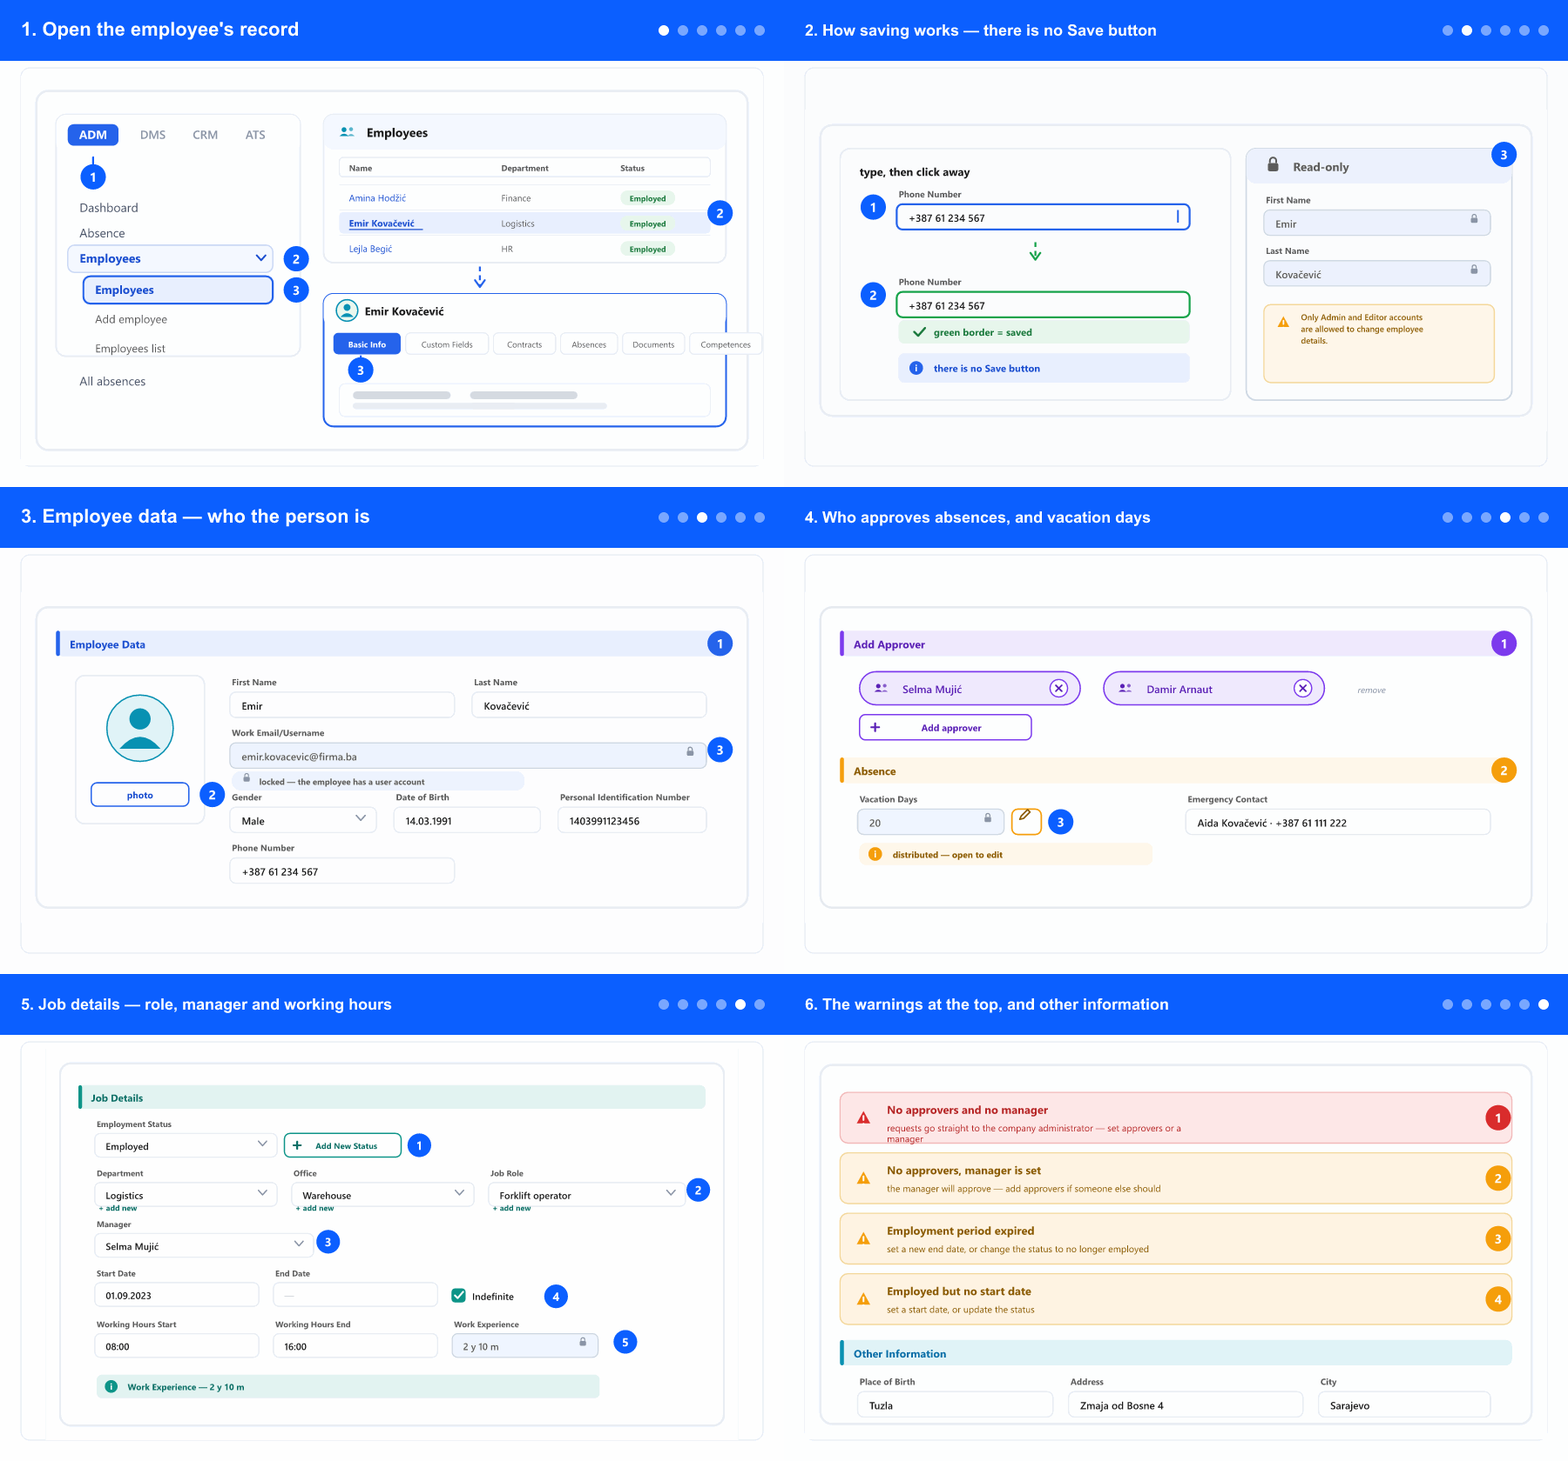
1. Open the employee's record
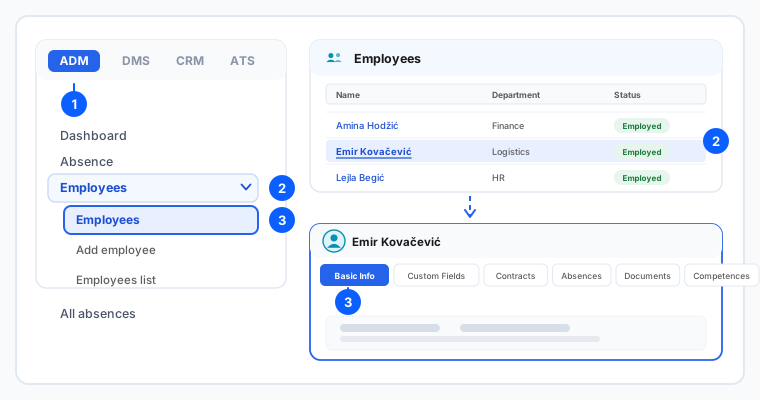
- In the left menu, open the ADM tab. The tabs (ADM / DMS / CRM / ATS) appear only when your company uses more than one module — otherwise the items are visible right away.
- Select Employees. The employee list opens.
- Click the person's name. Their record opens on the Basic Info tab.
- Along the top of the record there is a strip of tabs — Basic Info, Custom Fields, Contracts, Absences, Documents, Competences, Evaluations, Assets, and sometimes Comments and Mobile Kiosk Restriction. This guide covers the first one; the others have their own guides.
- Which tabs you see depends on your company setup and your permissions.
2. How saving works — there is no Save button
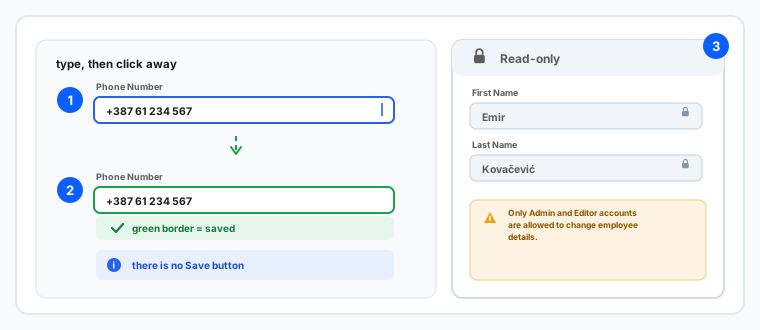
- Change a field and then click somewhere else (or press Tab). The change is saved at that moment — field by field.
- A saved field gets a short green border. That is your confirmation; there is no Save button anywhere on this tab.
- Because saving is immediate, there is nothing to cancel. If you change a value by mistake, type the previous one back.
- Only administrator and editor accounts can change employee data. With any other role every field is greyed out and a message explains that you need to contact your company administrator.
- Seeing your own record read-only is normal — employees cannot edit their own details.
3. Employee data — who the person is
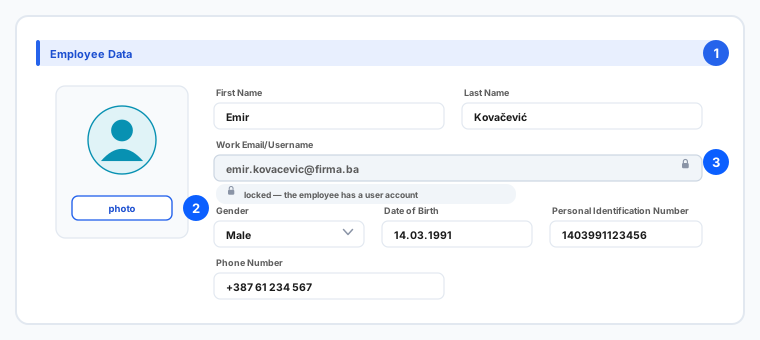
- Fill in First Name and Last Name — these are what appear everywhere else in the app, so fix typos here rather than working around them.
- Work Email/Username is both the business address and the sign-in name. Once the person has a user account this field is locked — change it through their user account instead.
- Add the Personal Identification Number, Date of Birth, Gender, private email, phone number and time zone as your company needs them.
- Click the photo area to upload a picture (JPG or PNG). The photo shows next to the person's name across the app.
- Nothing here is mandatory except what your company already required when the employee was created — you can complete the record gradually.
4. Who approves absences, and vacation days
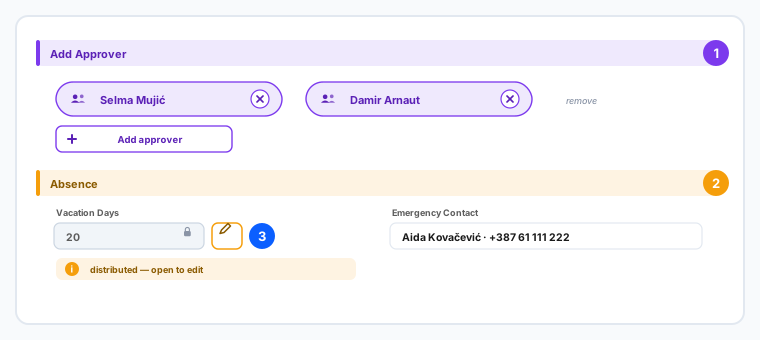
- In Add Approver, pick the people who approve this employee's absence requests. You can add more than one — then every one of them has to approve.
- Remove an approver with the ✕ next to their name; you are asked to confirm first.
- If nobody is set here and the person has no direct manager either, their requests go straight to the company administrator. The warning at the top of the record tells you so — see step 6.
- In the Absence section, Vacation Days is this employee's entitlement for the year. Set the company-wide default first (in company settings) and only change it here for people who differ.
- If the field is greyed out, the days are recorded per basis rather than as one number. Use the edit button to the right of the field to see and change that breakdown.
- Fill in the Emergency Contact name and number — this is the person to call if something happens at work.
5. Job details — role, manager and working hours
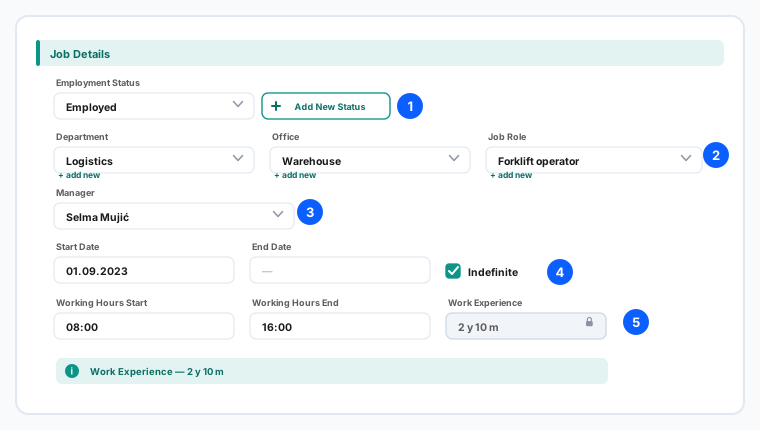
- Employment Status drives reports and whether the person counts as employed. If the status you need does not exist, use Add New Status right there — no need to leave the record.
- Set Department, Office and Job Role. Each of these also lets you add a missing value inline, and each keeps a history so you can see where the person worked before.
- Team and Business Unit are extra groupings some companies use for reporting; leave them empty if yours does not.
- Manager is the direct manager. This one matters beyond reporting: the manager approves absences when no approvers are set, sees this person in their own timesheet view, and confirms their monthly shift plan.
- Set Start Date — the first working day. Leave End Date empty and tick Indefinite for an open-ended contract; fill it in for a fixed-term one.
- Working Hours Start and End are the normal daily hours, used as the baseline in timesheets and shift plans.
- Shift Planners and Viewers decide who may plan this person's shifts and who may see their data — set them only when someone other than the manager needs that access.
- Work Experience is calculated from the start date and cannot be typed in.
6. The warnings at the top, and other information
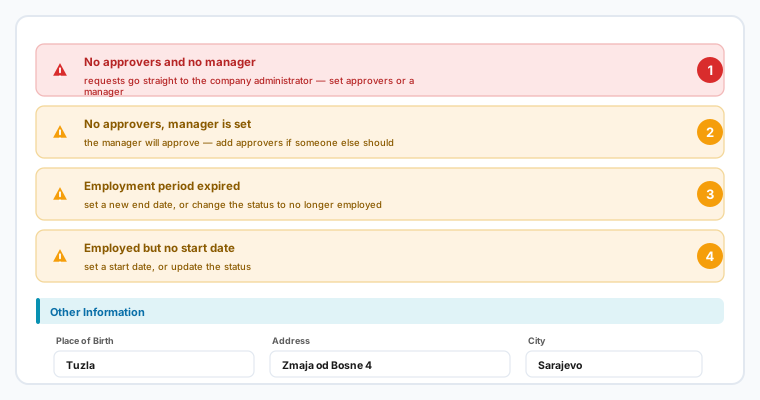
- No approvers and no manager — the person can submit absence requests, but they land with the company administrator. Fix it by adding approvers (step 4) or a manager (step 5).
- No approvers, but a manager is set — the manager will approve. That is fine; add approvers only if someone else should decide.
- Employment period expired — the end date has passed while the status still says employed. Either set a new end date or change the status, otherwise reports keep counting this person as active.
- Marked as employed but no start date — set the start date, or correct the status. Without a start date, work experience and several reports cannot be calculated.
- These are warnings, not errors: the record still saves. But each one means some other part of the app will behave in a way you did not intend.
- Further down, Other Information holds place of birth, citizenship, contract number and the full address (address, municipality, city, canton, entity, country of residence). Fill in what your company's documents and reports need.
- When you change the status to one that ends the employment, a confirmation appears first — read it, because it affects the person's access and their absence balance.
Every field on this tab saves by itself as soon as you leave it; the green border is the confirmation. Only administrators and editors can edit. Company-specific sections may appear in addition to the ones described here.
Related: Employee records and user accounts, password changes · Add a new employee · Employee contract linked documents (annexes) · Vacation carry-over policy.