Set up the shift types your company uses — their name, code, working hours, breaks and who can see them. The list now also shows a Total hours column, so you can see at a glance how long each shift lasts. This guide starts at the left menu, then walks through the shift list and its toolbar, the new Total hours column, adding or editing a shift, and deleting one. This page uses the English labels from the product.
The whole flow in one place (loops continuously). Each step below explains one part.
1. Open shift configurations from the menu
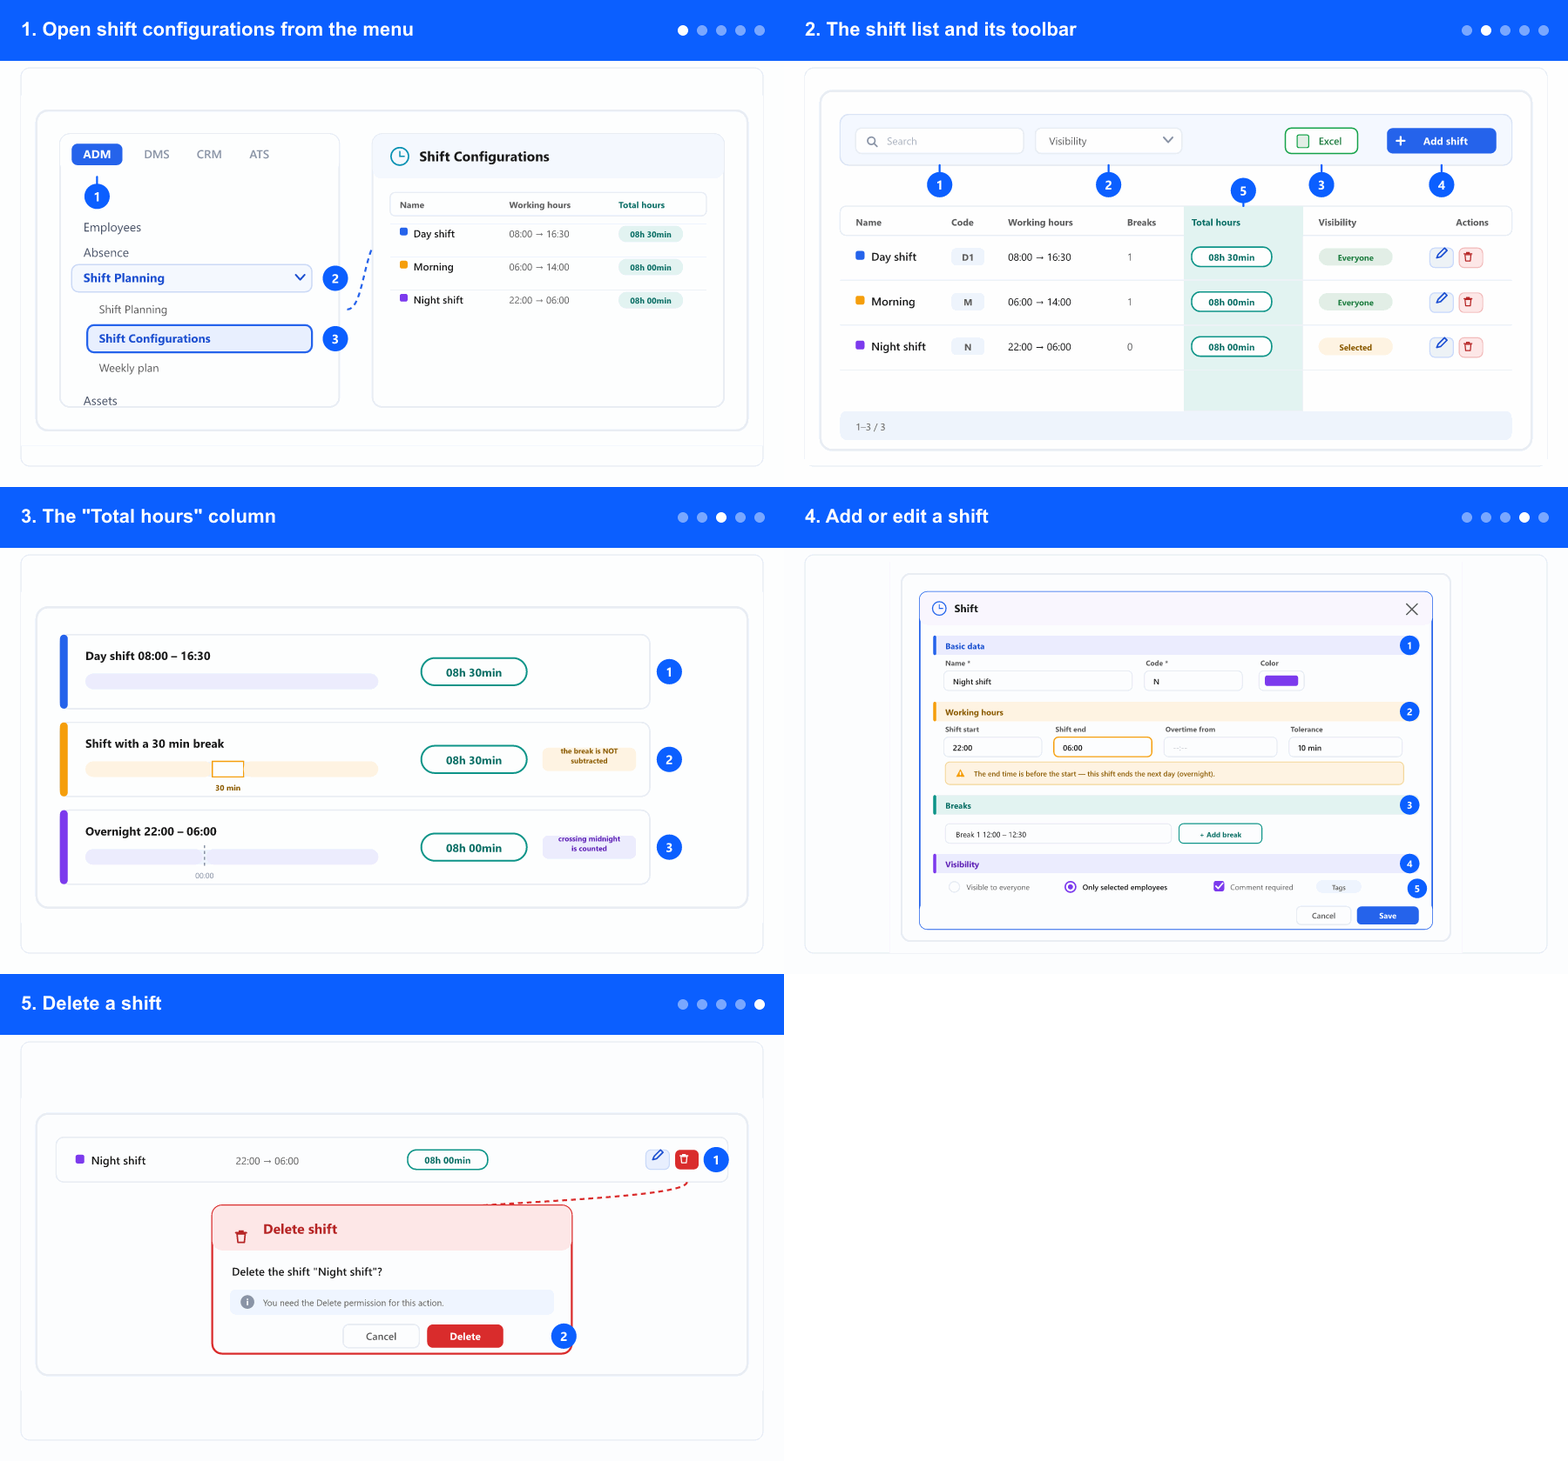
① Open the ADM tab · ② the Shift Planning group · ③ select Shift Configurations.
In the left menu, open the ADM tab. The tabs (ADM / DMS / CRM / ATS) only appear when your company uses more than one module — if you have a single module, the menu items are shown directly, so skip to the next step.
Open the Shift Planning group and select Shift Configurations. Tip: you can also type Shift Configurations in the menu search box at the top.
Don't see Shift Configurations? You need the View permission for this screen — ask a company administrator. The Add, Edit and Delete buttons appear only if you also hold those permissions.
The screen opens with the list of shifts. The same screen also has a modern view at the same place, with search, a visibility filter, paging and Excel export.
2. The shift list and its toolbar
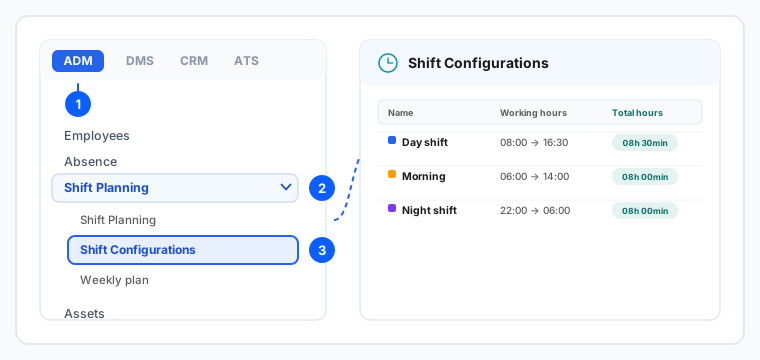
① Search · ② Visibility filter · ③ Excel · ④ Add shift · ⑤ the new Total hours column.
Use the Search box to find a shift by name or code, and the Visibility filter to show only shifts visible to everyone or to selected employees.
Use Excel to export the current list, and Add shift to create a new one.
The columns, in order, are: Name, Code, Working hours (start → end), Breaks, Total hours, Visibility, Created and Actions.
The Total hours column is new — it shows how long each shift lasts. It is explained in the next section.
3. The "Total hours" column
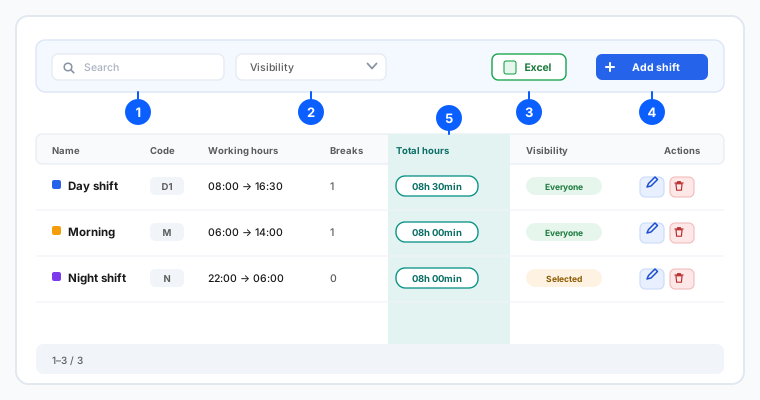
① day shift 08:00–16:30 = 08h 30min · ② a shift with a break — the break is not subtracted · ③ overnight 22:00–06:00 = 08h 00min.
For every shift, Total hours shows the full duration from start to end, in the 08h 30min format (hours and minutes).
Breaks are not subtracted — the value is the whole span from the shift start to the shift end, even when the shift has one or more breaks.
Night shifts that cross midnight are counted correctly — for example 22:00–06:00 is 08h 00min, not a negative or zero value.
The value appears automatically for all shifts, including ones created earlier — there is no setting to switch on. In the modern view it is also included in the Excel export.
4. Add or edit a shift
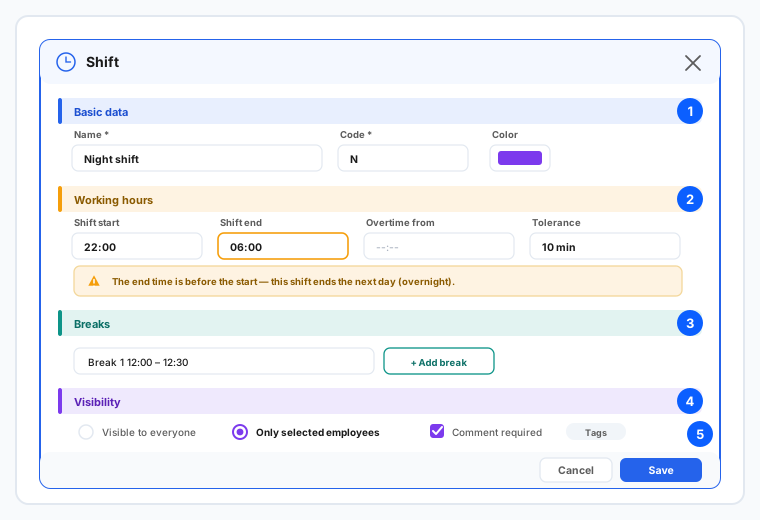
① Basic data · ② Working hours · ③ Breaks · ④ Visibility · ⑤ Save.
Click Add shift to create a new shift, or the edit action on a row to change an existing one. The same dialog opens; for an edit it is pre-filled with the current values.
Fill in Basic data — Name and Code are required (marked *) — and pick a Color for the shift.
Set Working hours: Shift start and Shift end, optional Overtime start/end and Tolerance for arrival/departure. If the end time is earlier than the start, a warning tells you the shift ends the next day (an overnight shift) — that is expected and the Total hours is still counted correctly.
Add Breaks and Project hours rows as needed, set Visibility (visible to everyone, or only to selected employees) and turn on comment required if you want one; add Tags if you use them. Then click Save.
5. Delete a shift
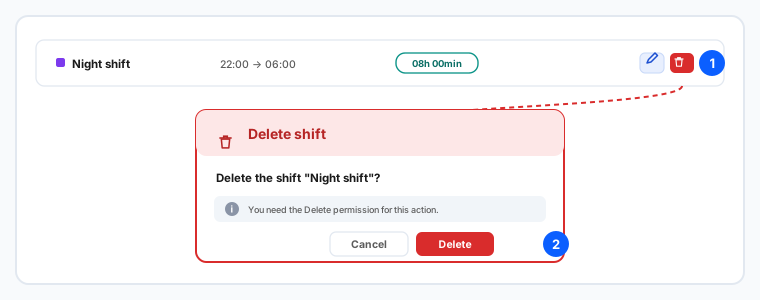
① the Delete action on the row · ② a red confirmation with Cancel and Delete.
On the shift's row, use the Delete action.
A red confirmation dialog appears with the shift name. Click Delete to remove the shift, or Cancel to keep it.
You need the Delete permission for the action to be available — if you don't see it, ask a company administrator.
6. Tips
Total hours is display-only — it requires no action. To change a shift's duration, edit its Shift start and Shift end; the value recalculates automatically.
Breaks are shown in their own column but are not subtracted from Total hours — the column is the full span from start to end.
Total hours shows up automatically for existing shifts too — there is nothing to configure and no need to re-save old shifts.
In the modern view, the Excel export mirrors the list you see on screen, including the Total hours column.