This guide assumes you already know the screen itself. If not, read Enter your work hours (timesheet) first — the list, the cells, the entry form and the history tab work exactly the same for someone else's hours as for your own.
1. Pick whose hours you are looking at
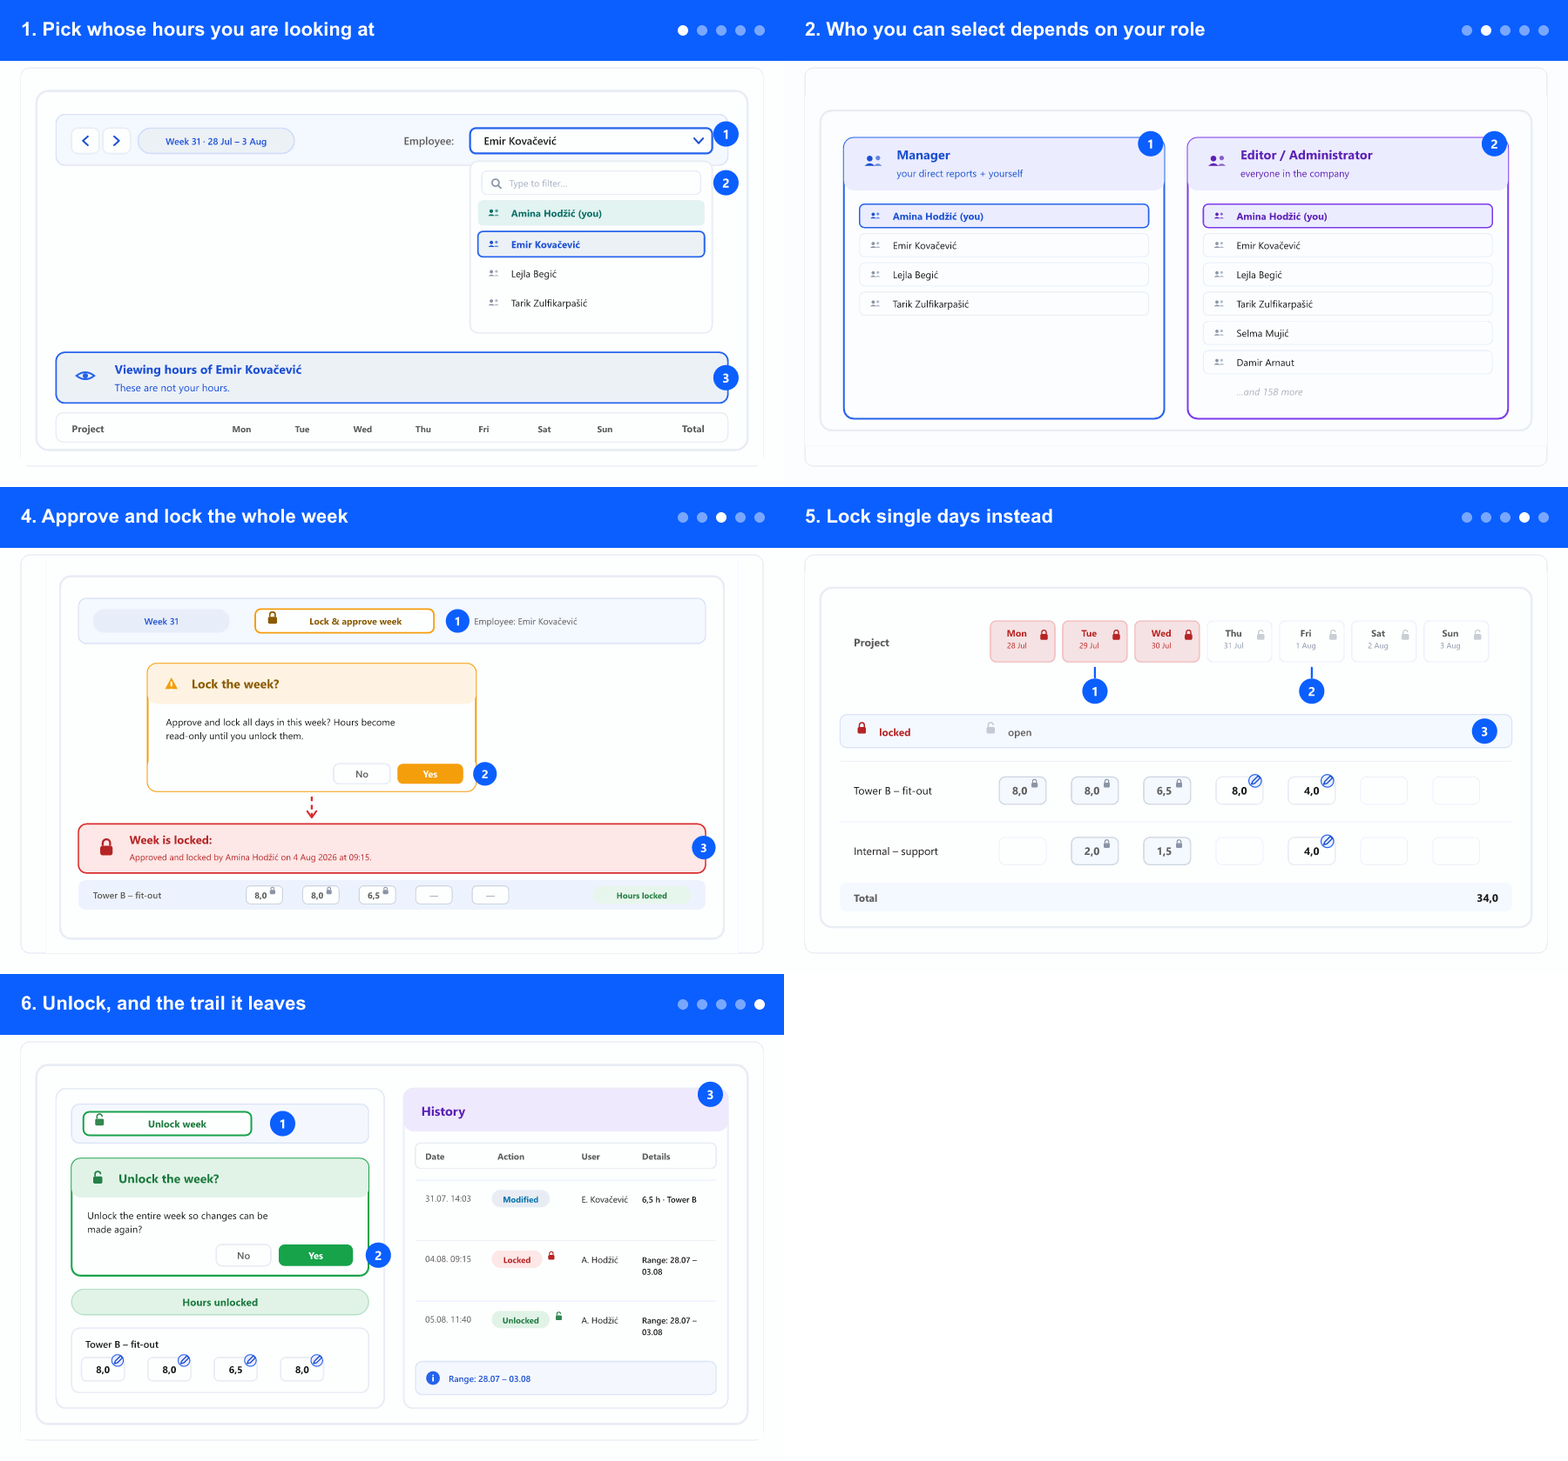
- Open the timesheet as usual: ADM tab → Track Time → Single Person. It always opens on your own week.
- In the toolbar, find Employee: and open the dropdown. Your own name is first, so you never lose track of your own row.
- Start typing to filter — useful when the list is long.
- Pick a person. Their week loads immediately, for the same week you were already viewing.
- A blue banner appears: Viewing hours of … and These are not your hours. Check it before you edit anything — this is the safeguard against correcting the wrong person's timesheet.
- To go back to your own hours, pick your own name from the same dropdown. The banner disappears.
- No Employee: dropdown at all? Then you don't have permission over anyone else's hours, and this guide does not apply to your account.
2. Who you can select depends on your role
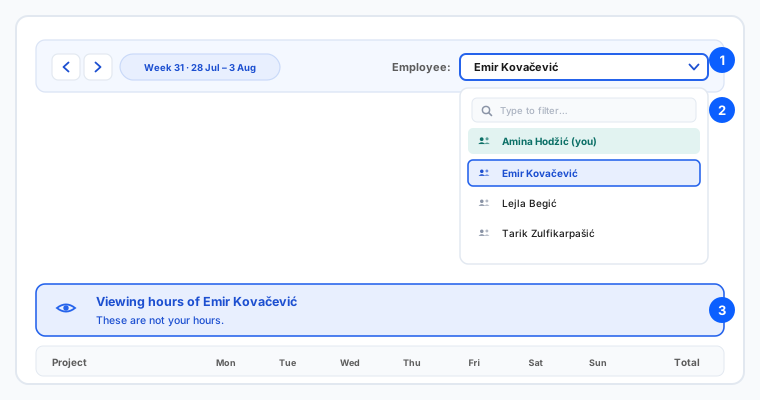
- As a manager, the dropdown lists your direct reports plus yourself. People who report to someone else are not there — that is deliberate, not a missing permission.
- As an editor or administrator, the dropdown lists everyone in the company.
- Someone missing who should be your report? Their direct manager is set on the employee record — ask an administrator to check it.
3. Correct someone else's hours
- With the blue banner showing, the list behaves exactly as it does for your own hours: click a cell and type, use the + to add an entry, or ✎ to edit one.
- Editing another person's hours is allowed on purpose — that is how corrections get made before approval.
- Every change is recorded under your name. Open the History tab on the entry to see who changed what and when — so a later question about a corrected figure has an answer.
- Vacation and sick-leave days still cannot be edited here; they come from the absence module.
- A day or week that is already locked cannot be edited — unlock it first (step 5).
4. Approve and lock the whole week
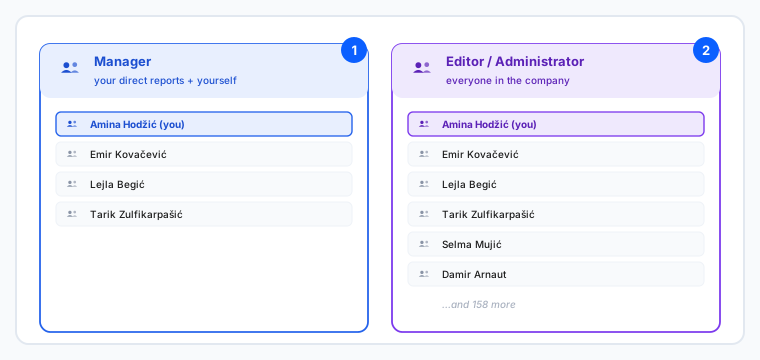
- Check the week pill and the employee banner one more time — you are about to freeze that person's week.
- Click Lock & approve week in the toolbar.
- Confirm in the dialog: Lock the week? Approving locks all seven days and makes the hours read-only.
- The red banner Week is locked appears, showing who approved it and when. The employee sees the same banner and can no longer change anything.
- Don't see the button? Two possible reasons: your company does not have hour approval switched on, or you are looking at your own hours — the lock controls only appear on someone else's timesheet.
5. Lock single days instead
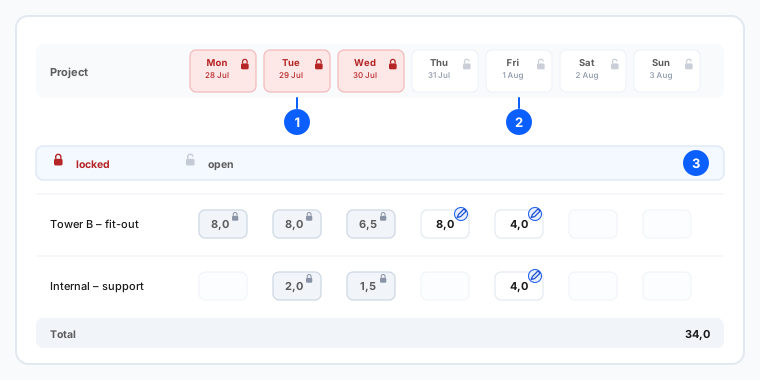
- Each day header carries a small padlock button. Click it to lock or unlock just that day.
- A solid, closed padlock means the day is locked. A faded, open one means it is still editable.
- Use this when most of the week is settled but one day is still in question — lock what is agreed and leave the rest open.
- A partly locked week shows no red banner: the banner appears only when every day of the week is locked.
- On a phone, the same padlock sits in the day toolbar next to the date, so single days can be locked there too.
6. Unlock, and the trail it leaves
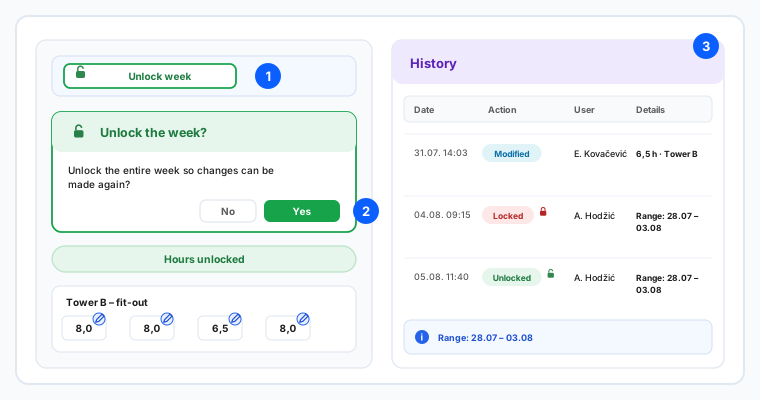
- Once a week is fully locked, the toolbar button becomes Unlock week.
- Click it and confirm Unlock the week? All seven days become editable again and the red banner disappears.
- To reopen a single day instead, click that day's padlock again.
- Nothing is hidden: open any entry's History tab and the Locked and Unlocked rows are listed with who, when, and the range of days affected — alongside the normal Created and Modified rows.
- That trail is the reason to lock rather than rely on people not editing: a reopened and re-approved week is always explainable afterwards.
The lock buttons appear only when your company has hour approval switched on and you are viewing someone else's timesheet. Which people you can select comes from your role and the direct-manager setting on the employee record. Turning hour approval on, and setting up projects and hours types, are administrator tasks done on other screens.
Entering your own hours: Enter your work hours (timesheet). Printing the monthly record: Detailed timesheet: print to PDF.