1. Open Detailed Timesheet from the menu
- In the left menu, open the ADM tab. The tabs (ADM / DMS / CRM / ATS) only appear when your company uses more than one module—otherwise the items show directly, so skip to the next step.
- Open the HR Reports group and select Detailed Timesheet.
- Seeing a no access page means your role is missing the permission—contact a company administrator.
2. Set the period, filter the list, print a group
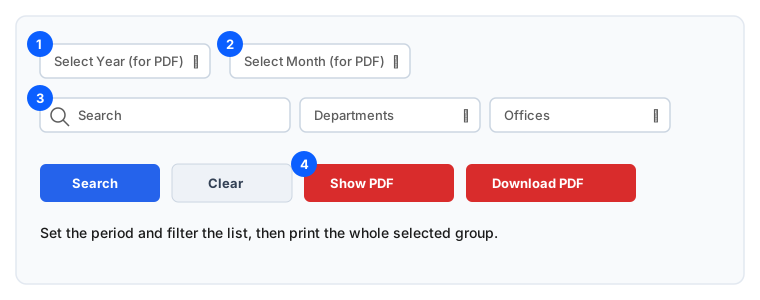
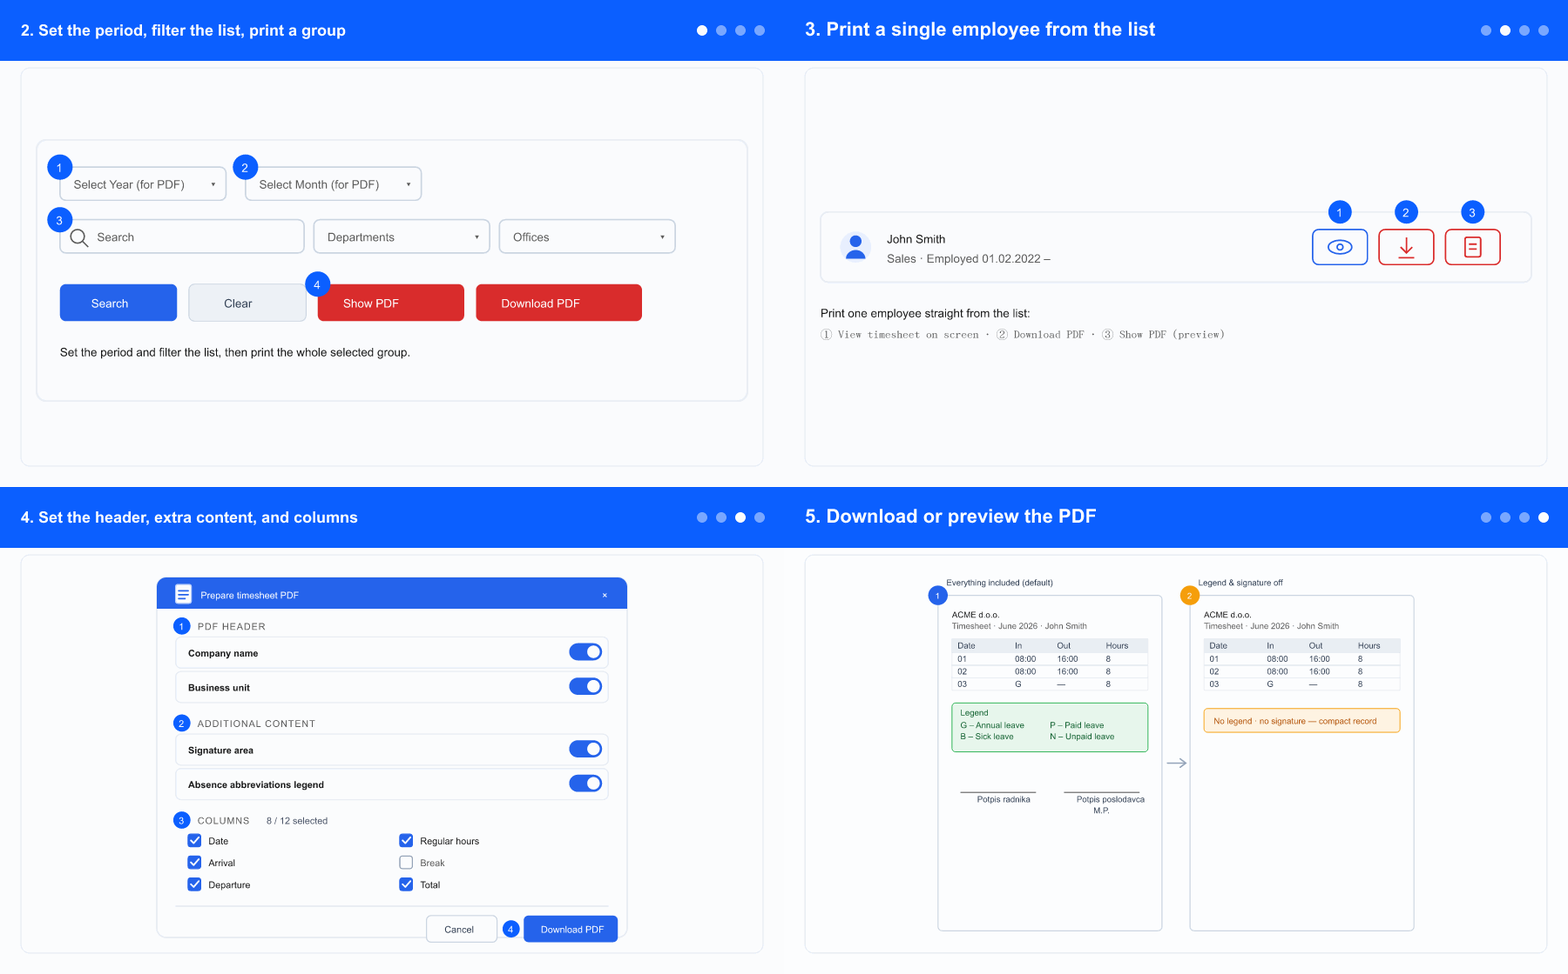
- Pick the Select Year (for PDF) value—the period is required before printing.
- Pick the Select Month (for PDF) value.
- Narrow the list with the Search box and the Departments / Offices filters, then click Search (Clear resets the filters).
- To print several people at once, tick the employees in the list (or use Select All), then click Show PDF to preview or Download PDF to save the file. The picker opens next.
3. Print a single employee from the list
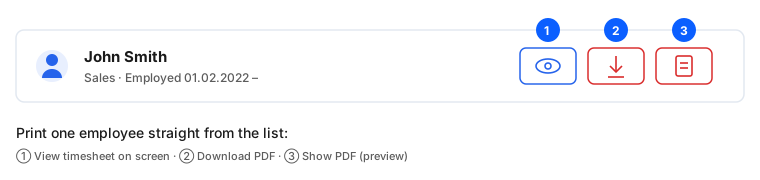
- Find the employee in the list. Use View Timesheet to open their record on screen (no PDF).
- Click Download PDF to save that one employee's PDF. The picker opens next.
- Click Show PDF to preview that one employee's PDF on screen. The picker opens next.
4. Set the header, extra content, and columns
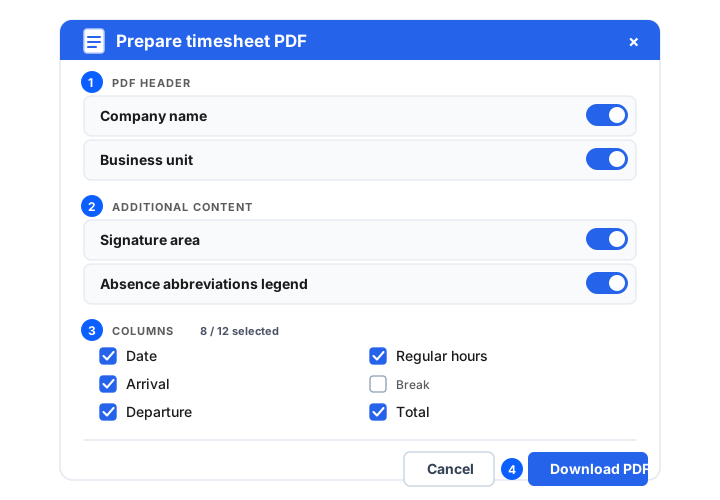
- At the top, the PDF header section has two switches—Company name and Business unit. Leave both on for a "Company — Unit" header, or turn one off to keep only the other. You can't turn off both—at least one always prints.
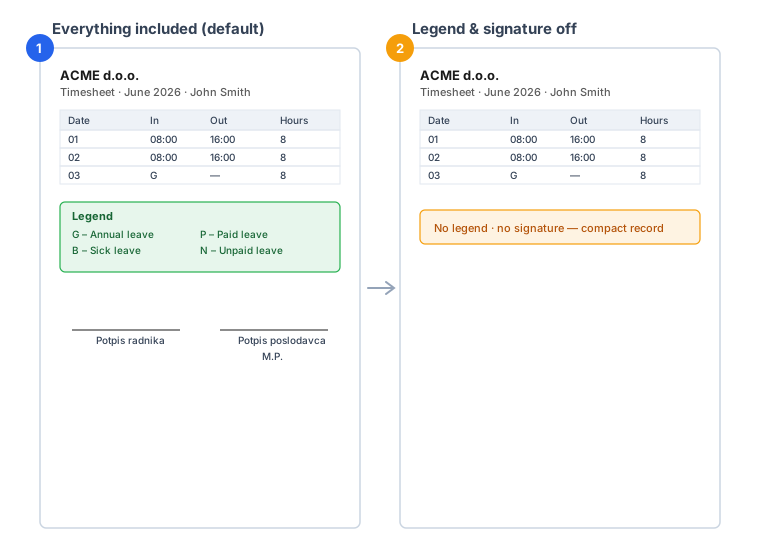
- Under Additional content, switch Signature area and Absence abbreviations legend on or off (the signature/stamp lines and the small list explaining each absence code).
- In Columns, tick the columns to include—use Select all to toggle them all. Your column choice is remembered for next time.
- All options reset to on each time the popup opens. Click the primary button—Show PDF or Download PDF, matching how you opened the popup—to generate it.
5. Download or preview the PDF
- If you chose Download PDF, the file is saved to your computer. If you chose Show PDF, it opens in a preview window you can then download.
- The PDF includes only the sections you ticked—so it can be the full, sign-ready record or a compact list of hours.
- For a group print, the same choice applies to every employee's page in the document.
The absence abbreviations and their meanings depend on your company's setup. Employee details, columns and hours are unchanged; you control the page header (company name / business unit) and whether the legend and signature sections appear. At least one header option always prints, so the header is never empty.