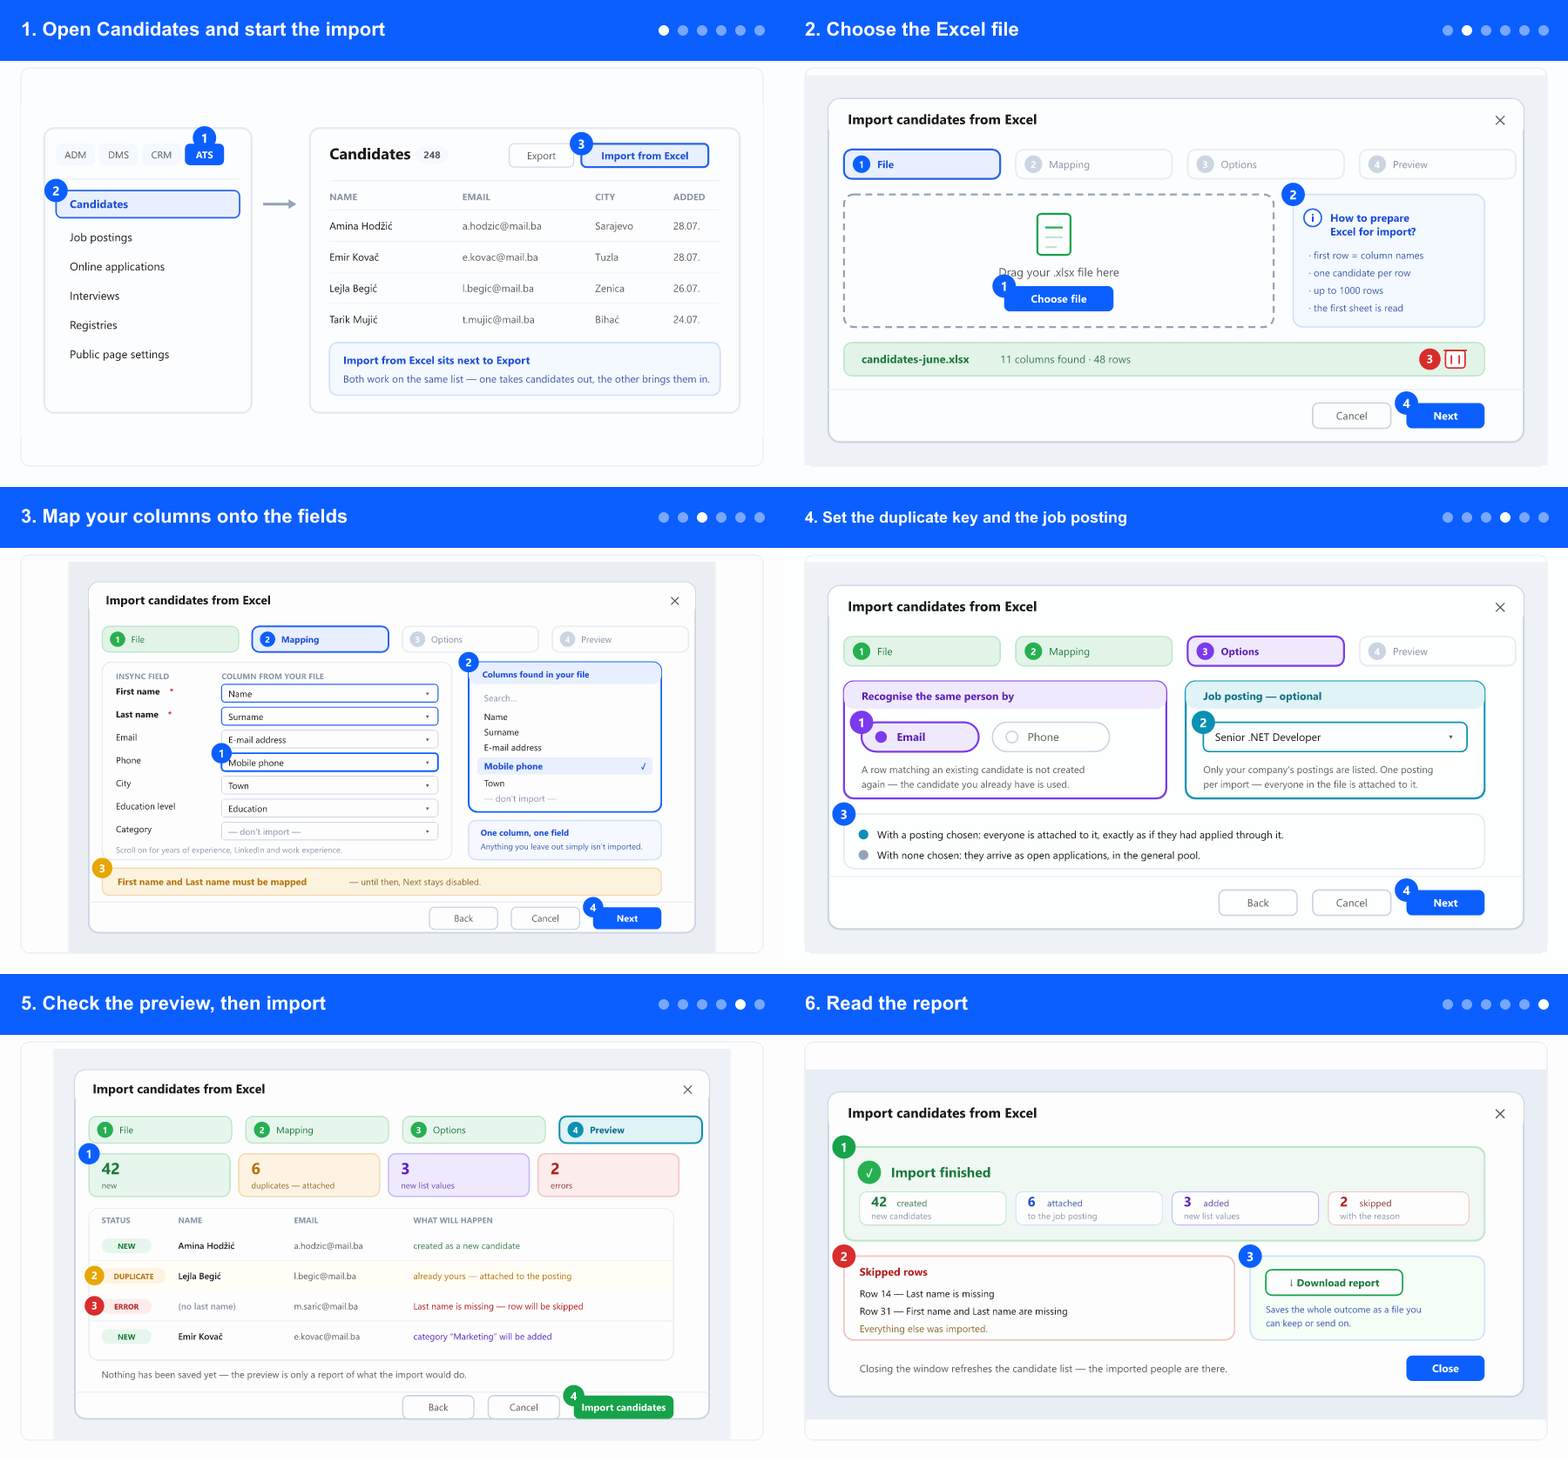
1. Open Candidates and start the import
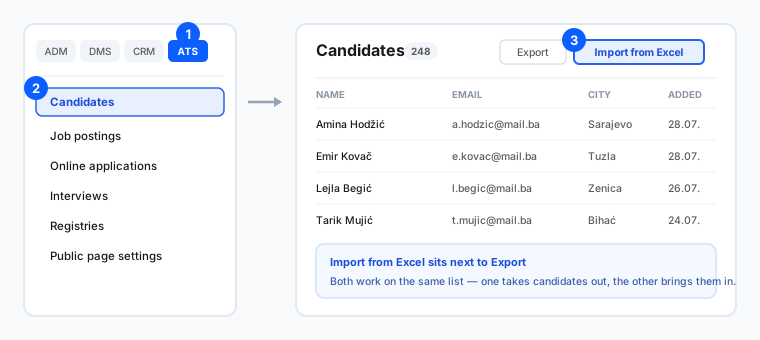
- In the left menu, open the ATS tab. The tabs (ADM / DMS / CRM / ATS) appear only when your company uses more than one module — otherwise the items are visible right away, so move on to the next step.
- Select Candidates. The candidate list opens.
- Above the list, click Import from Excel — it sits right next to Export. The import window opens.
- Don't see the button? It is shown only to users who may add ATS candidates — contact your company administrator.
2. Choose the Excel file
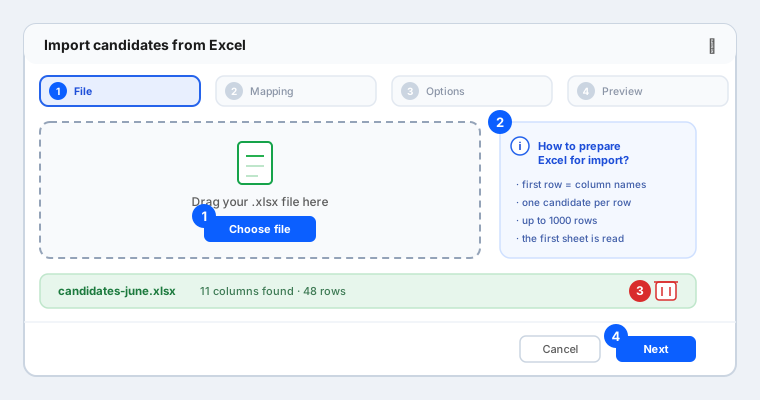
- Click Choose file and pick your .xlsx file, or drag it onto the marked area.
- Prepare the file so the first row holds the column names and each following row is one candidate. Column order and column names are up to you — you connect them in the next step.
- Click How to prepare Excel for import? for a short reminder of these rules. One file may contain up to 1000 rows; for longer lists, split it and import in parts.
- Once the file is read, its name appears together with the number of columns found and the number of rows. Reading a large file takes a moment — a message is shown while it works.
- Picked the wrong file? Click the delete icon next to its name and confirm, then choose another.
- Click Next.
- Only the first sheet of the workbook is read. If your data sits on a second sheet, move or copy it to the first one before importing.
3. Map your columns onto the fields
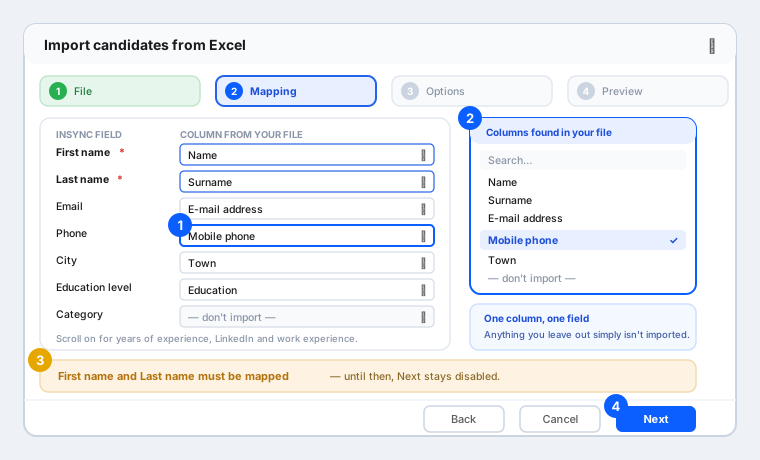
- Each row is one InSync field: First name, Last name, Email, Phone, City, Education level, Category, Years of experience, LinkedIn and Work experience.
- Open the dropdown next to a field and choose the column from your file that belongs to it. The list contains every column found in the file — type in the box to filter it when the file has many columns.
- Choose “— don't import —” for anything you don't want to bring in. That field is then left empty on the imported candidates.
- First name and Last name are required. Until both are mapped, a note at the bottom says so and Next stays disabled.
- Nothing is matched automatically — every field is your choice. Check the pairs once before continuing; a column put in the wrong field is much slower to clean up afterwards than to set correctly now.
- Click Next.
4. Set the duplicate key and the job posting
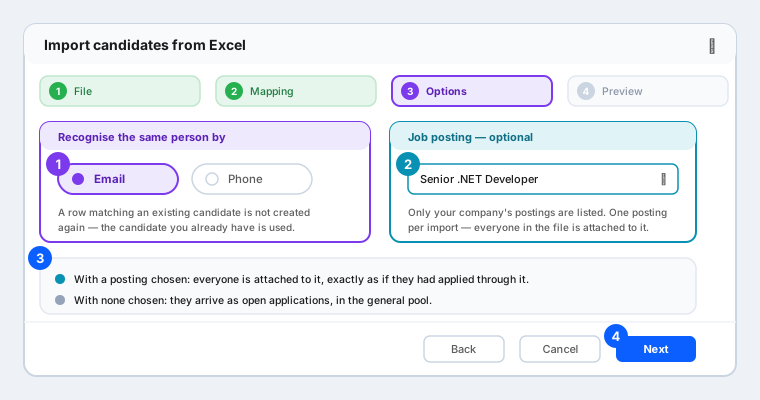
- Choose whether the same person is recognised by email or by phone. Pick the one your file fills in reliably — if only some rows have an email, phone is the safer key.
- Optionally choose one job posting from the list. Only your own company's postings are offered.
- With a posting chosen, everyone in the file is attached to it exactly as if they had applied through it, and their positions of interest are taken from that posting.
- With no posting chosen, the candidates arrive as open applications in the general pool.
- One import handles one posting. To spread a file across two postings, split the file and import it twice.
- Click Next.
5. Check the preview, then import
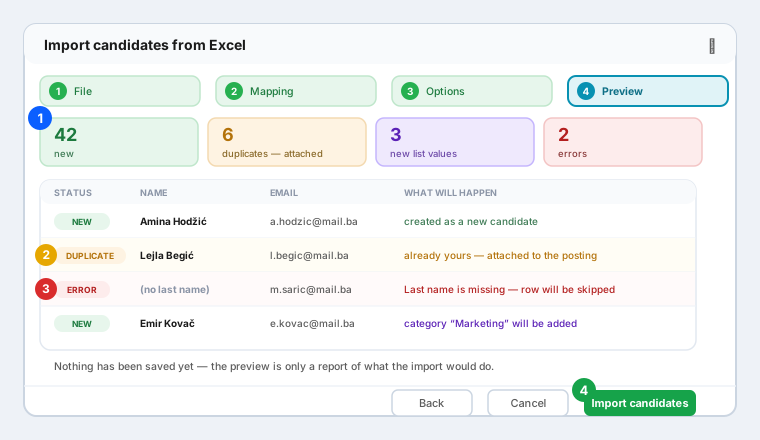
- Read the counters at the top: how many candidates are new, how many are duplicates you already have, how many new list values will be added, and how many rows have an error.
- In the table, every row is marked NEW, DUPLICATE or ERROR, with what will happen to it written out.
- DUPLICATE means the person is already in your base under the key you chose. They will not be created again; if you picked a posting, the candidate you already have is attached to it and their existing record is left untouched.
- ERROR means the row can't be imported — a missing first or last name, for example — and the message names the field. Such a row is skipped; everything else still imports.
- Rows that will add a new education level or category say so. Those values are created in your company's lists during the import, so you don't have to prepare the lists in advance.
- Nothing has been saved up to this point. When the preview looks right, click Import candidates.
- Want to fix something first? Use Back to change the mapping or the options, or Cancel to close without importing.
6. Read the report
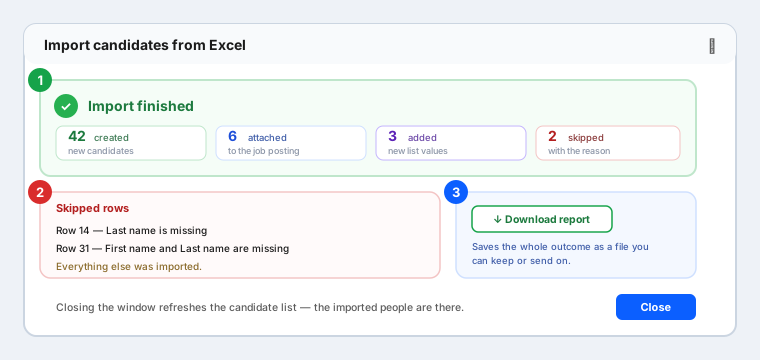
- The report shows how many candidates were created, how many existing ones were attached to the posting, how many new list values were added, and how many rows were skipped.
- Each skipped row is listed with its reason, so you can find it in your own file.
- Click Download report to save the whole outcome as a file you can keep or pass on. It follows your product language.
- Fix the skipped rows in your file and import just those rows. Candidates that already came in are recognised as duplicates, so nothing is created twice.
- Close the window. The candidate list refreshes and the imported people are in it.
- No email is sent to candidates during an import, whether they are new or attached to a posting.
CVs and documents are not imported — attach those on the candidate's profile afterwards. New candidates get your company's default status. Job postings, duplicate checks, imported candidates and new list values all stay strictly within your own company. Labels follow your product language; the button is available only to users who may add candidates.
Looking for the rest of this screen — search, filters, ranking or Excel export? See Candidate list: search, filters and ranking.