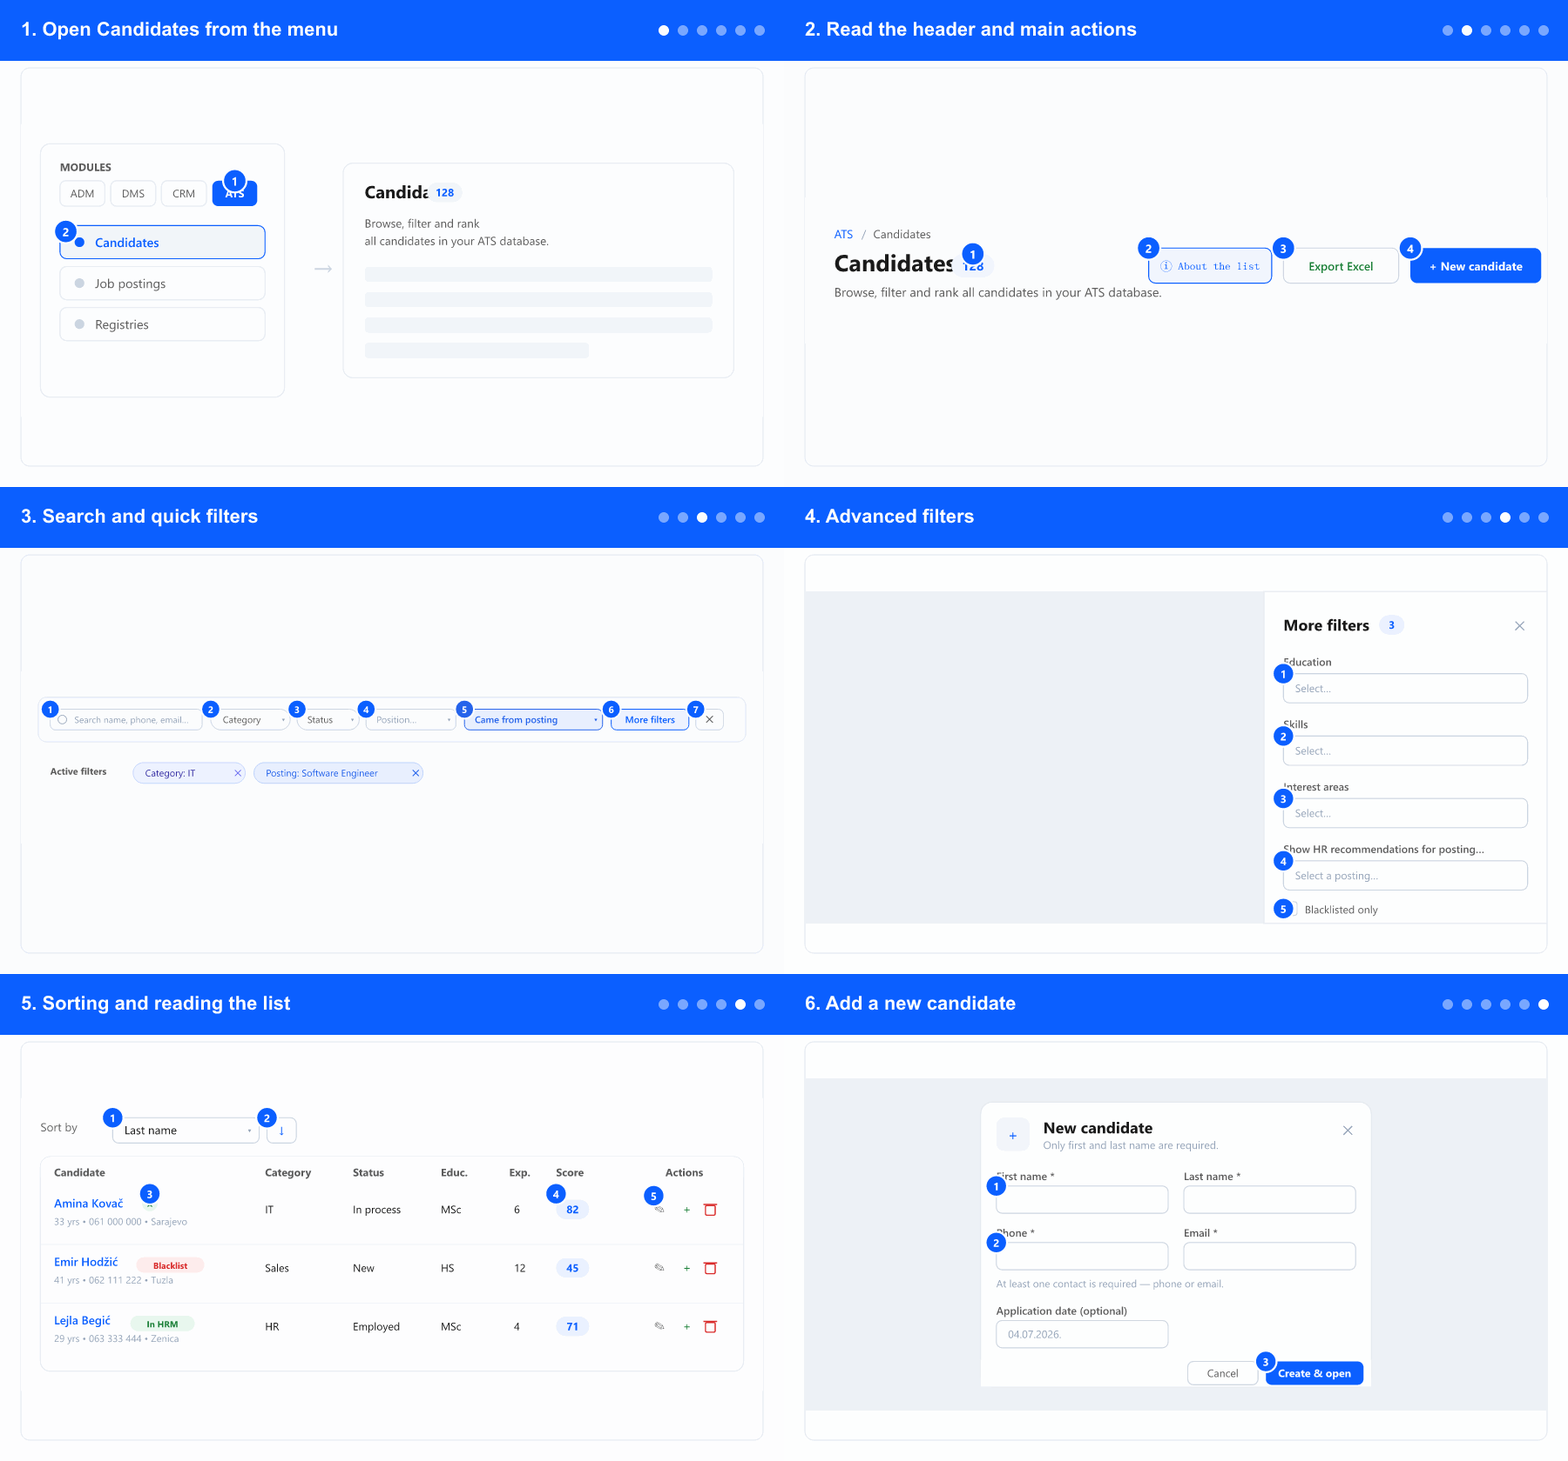
1. Open Candidates from the menu
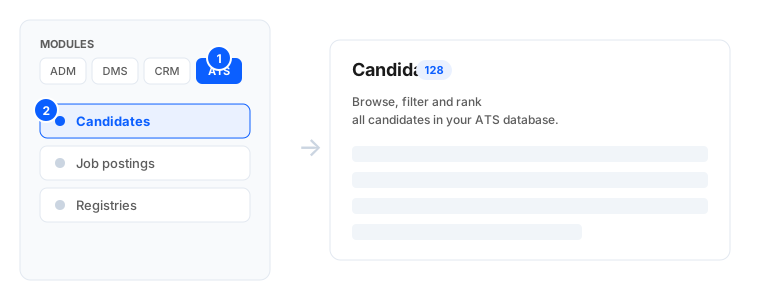
- In the left menu, open the ATS tab. The tabs (ADM / DMS / CRM / ATS) appear only when the company uses more than one module — otherwise the items are visible right away, so move on to the next step.
- Select Candidates. This opens the list of all candidates in the ATS database.
- Don't see Candidates? The item is shown only to users who have permission to view ATS candidates — contact your company administrator.
2. Read the header and main actions

- Next to the Candidates title is the total number of candidates matching the current filters.
- About the list opens a short explanation of every column — what each one means, when and why data appears, and how sorting works. Handy for new team members or whenever a column isn't clear.
- Export Excel downloads the currently filtered and sorted list as an Excel file.
- New candidate opens the quick form for entering a new candidate (see step 6).
3. Search and quick filters
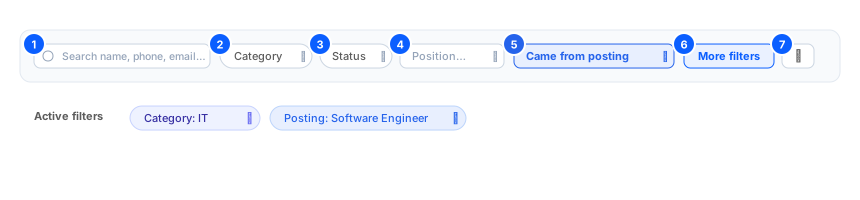
- In the Search field, type a name, phone or email — the list narrows as you type.
- Use the Category and Status pills to select one or more values.
- Use the Filter by position… dropdown to pick a position; this also reveals the Score column (ranking for that position — see step 5).
- Use the Came from posting dropdown to show only candidates who applied through one or more selected job postings. Tick several to combine them (anyone who applied to any of the chosen postings); each choice appears as a chip below the bar. This is separate from the HR recommendations for posting option in advanced filters (step 4).
- Next to it, the Free applications toggle adds candidates who applied to your company without a specific posting — a general application. Turn it on on its own to see only those, or combine it with Came from posting to widen the list to both. It also appears as a removable chip.
- More filters opens the advanced filters (step 4); the number next to the button shows how many are active.
- Each active filter appears as a chip below the bar — click ✕ on a chip to remove it, or Clear filters to remove them all at once.
4. Advanced filters
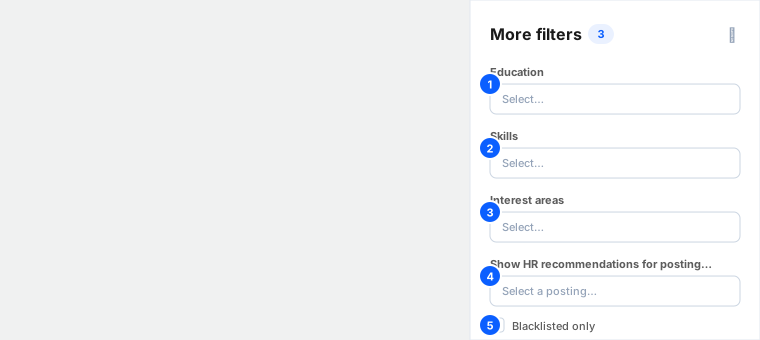
- Click More filters — a panel with additional filters slides out from the right.
- Narrow the list by Education, Skills and Interest areas (each allows multiple values).
- Show HR recommendations for posting… — selecting a posting narrows the list to only the candidates HR has recommended (★) for that posting. Candidates who were marked do-not-recommend or not yet reviewed are not shown; if a posting has no recommendations, the list is empty. (This is different from the inline Came from posting filter in step 3, which shows all applicants.)
- Check Blacklisted only to show exclusively candidates on the blacklist.
- Click Close to apply, or Reset filters to clear the advanced filters.
5. Sorting and reading the list
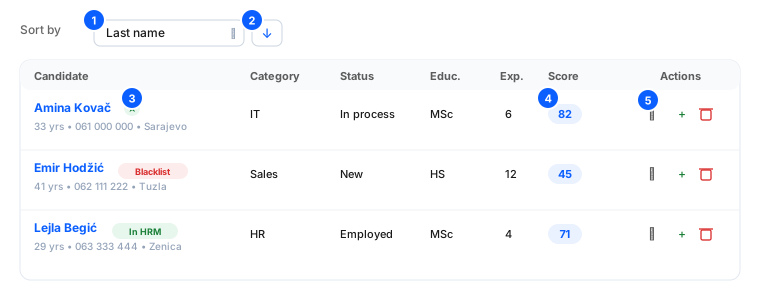
- In the Sort by bar, pick a field (e.g. Last name, Experience, Score, Last interview) — the options are now listed alphabetically, so the one you want is easy to find. You can also sort table columns by clicking their header.
- The button next to it changes the direction — ascending or descending.
- Badges appear next to the name: a star (HR recommends for the selected posting), a red Blacklist, and a green In HRM (the candidate has already been created as an employee — click to open the record).
- In the Candidate cell, under the name (next to phone and city), you also see the candidate's last application — the job posting title and the date they last applied. Candidates with no applications show nothing here.
- Candidates who applied without a specific posting (a general application) show a Free application marker here instead of a posting title, so you can spot them at a glance.
- Next to the candidate's category you see their email with a small copy icon — click it to copy the address to your clipboard (a short "Email copied to clipboard" confirmation appears and the icon briefly turns into a check). If the candidate has no email on file, the icon isn't shown. No need to open the profile just to grab the address.
- In the Added to system column, under the entry date, each candidate who has been interviewed shows their last interview — the date and the position it was for. It is always the candidate's most recent interview (regardless of filters); candidates never interviewed show nothing here.
- Click the last-interview line to open a read-only popup with that interview's details — the overall score, each rated skill with its comment, and the recorded answers — without leaving the list or opening the profile. A small open arrow on the left stays visible even when the position name is long (it shortens with an "…"). Candidates with no interview aren't clickable. In the popup, Open candidate profile jumps to the full profile (where scoring is done); on a phone the details open as a bottom sheet.
- You can order the list by this: choose Last interview in Sort by — most recent first, with candidates who have no interview pushed to the end.
- The Score column is visible only after you select a position (step 3) and shows the candidate's ranking result for that position.
- At the end of the row are the actions: Edit (opens the profile), Convert to employee and Delete. Below the list are the page navigation and the choice of rows per page (25 / 50 / 100).
6. Add a new candidate
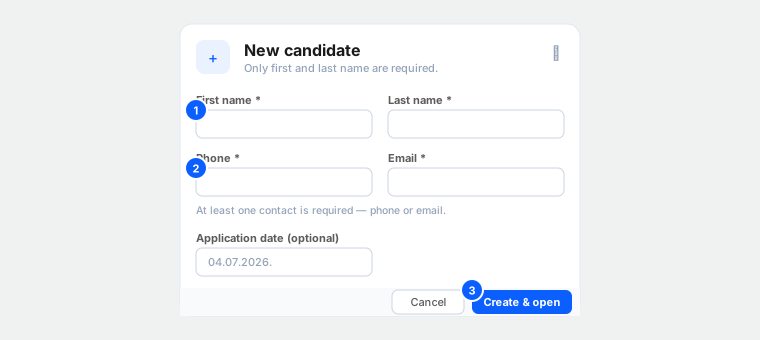
- Click New candidate (top right) to open the quick form.
- Enter the First name and Last name — both are required.
- Enter a Phone or an Email — at least one contact is required. Optionally add an Application date.
- Click Create & open. The candidate is created and their profile opens immediately, where you fill in the rest of the data (skills, documents, comments) on the fly.
Some actions and columns may depend on your permissions and company settings. If you don't see something, your company administrator can confirm your rights.