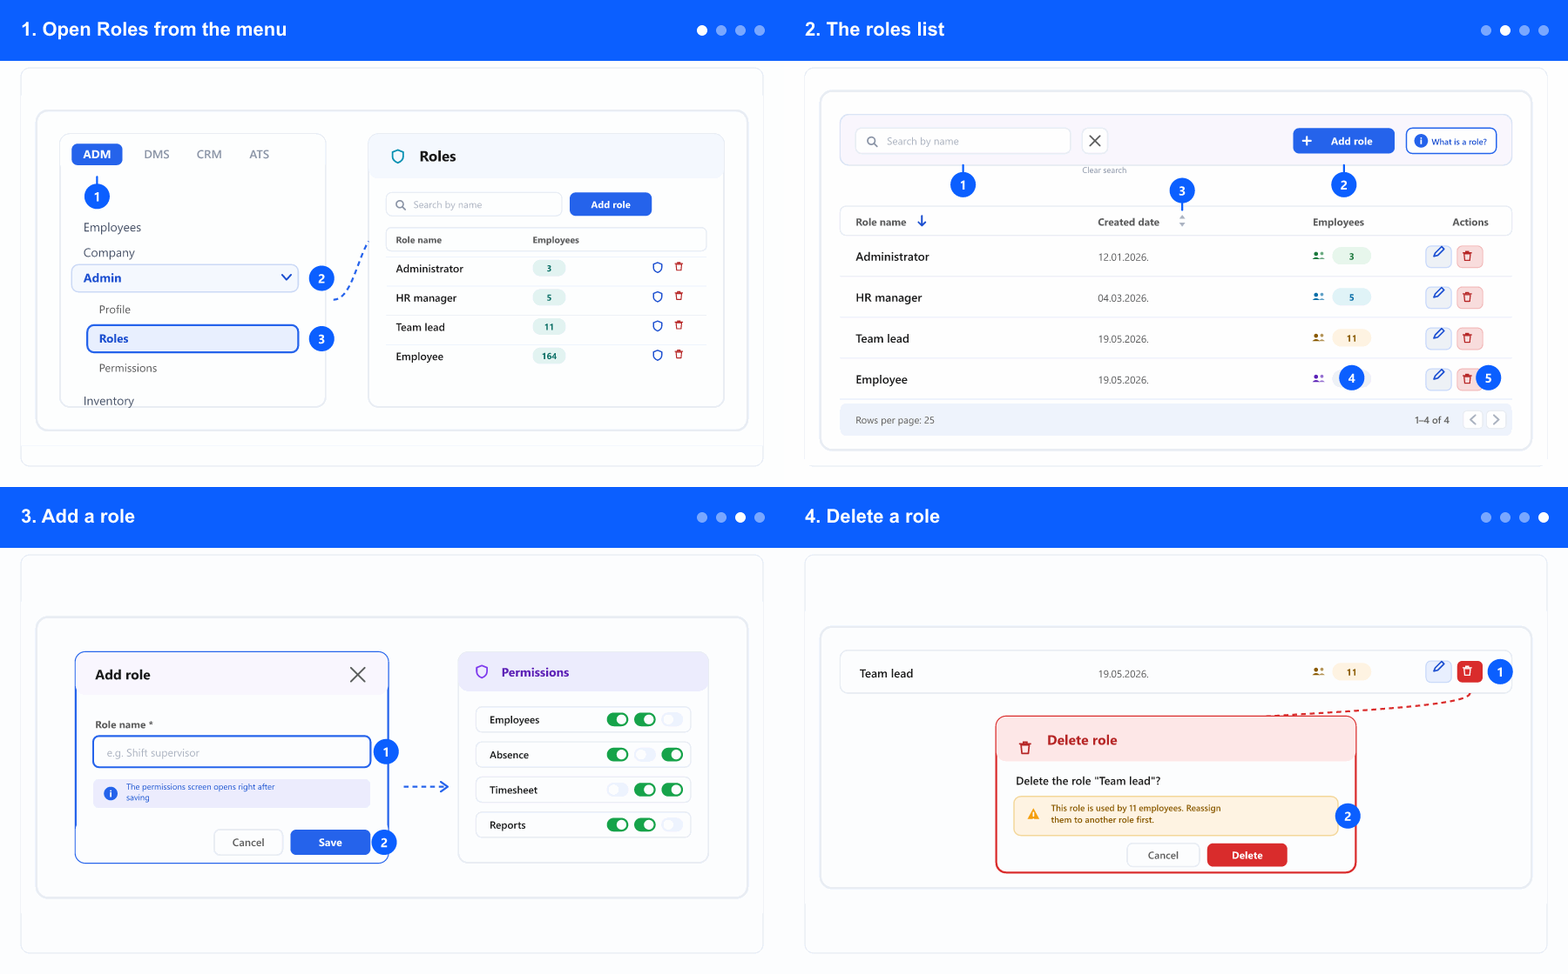
A role is a set of permissions that decides which pages and actions an employee can use. The Roles screen lists every role in your company and lets you search, add, edit permissions and delete. This guide starts at the left menu, then walks through the list, adding a role, and deleting one. Only high-privilege users (administrators and superadministrators) see this screen. This page uses the English labels from the product.
The whole flow in one place (loops continuously). Each step below explains one part.
1. Open Roles from the menu
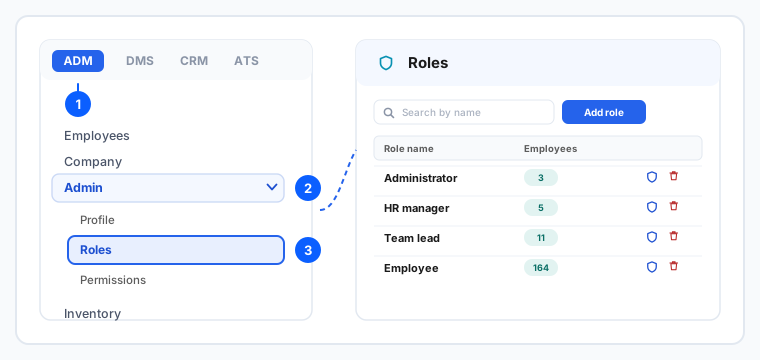
① Open the ADM tab · ② the Admin group · ③ select Roles.
In the left menu, open the ADM tab. The tabs (ADM / DMS / CRM / ATS) only appear when your company uses more than one module — if you have a single module, the menu items are shown directly, so skip to the next step.
Open the Admin group and select Roles. Tip: you can also type Roles in the menu search box at the top.
Don't see Roles? Administrators and superadministrators see it by default; other roles need the permission — ask a company administrator.
The screen opens with the list of all roles in your company.
2. The roles list
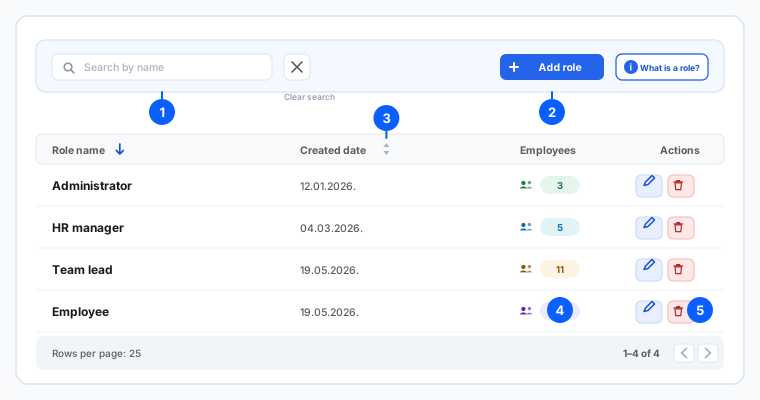
① Search by name · ② Add role · ③ sortable headers (arrow shows direction) · ④ the employees count chip · ⑤ actions (edit permissions / delete).
Type in Search by name to filter the list as you type; Clear search restores every role.
Use Add role to create a new role (see the next section).
Click a column header — Role name or Created date — to sort; the arrow shows the direction. Clicking the same header again cycles descending → ascending → default.
The Employees chip shows how many people currently use each role. The list is paged — use the rows-per-page selector and pager at the bottom.
The Actions column has an edit-permissions button and a delete button for each role.
3. Add a role
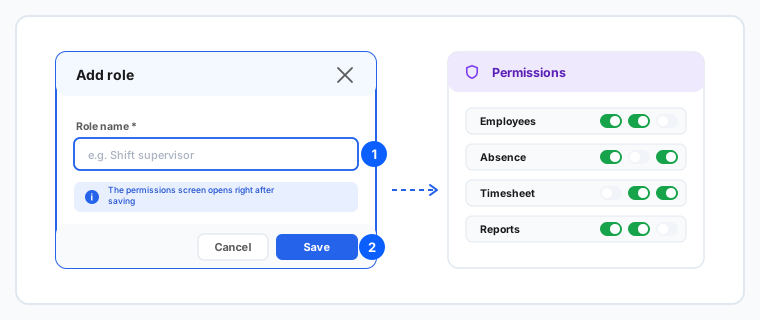
① enter the Role name (required) · ② click Save — the permissions screen opens next.
Click Add role in the toolbar. A small dialog opens.
Type a Role name — this field is required.
Click Save. The role is created and the permissions screen for it opens automatically, so you can immediately choose which pages and actions it may use.
Pick the pages and actions for the new role, then save your selection there.
4. Delete a role
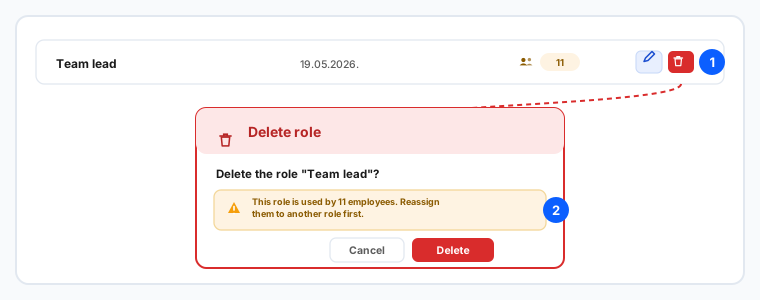
① the in-use warning with the employee count · ② confirm with the red Delete button.
In the row's Actions, click the delete (trash) button. A red confirmation dialog opens.
If one or more employees currently use the role, a warning banner shows the count. We recommend reassigning those employees to another role first.
Click Delete to confirm, or Cancel to keep the role.
5. Tips
Not sure what a role is? Click the What is a role? info button in the toolbar for a short explanation.
To change what a role can do, click the role name (or the shield icon) to open its permissions screen.
The Employees count chip tells you at a glance how many people rely on each role.
Before deleting a role that is in use, reassign those employees to another role so nobody loses access unexpectedly.