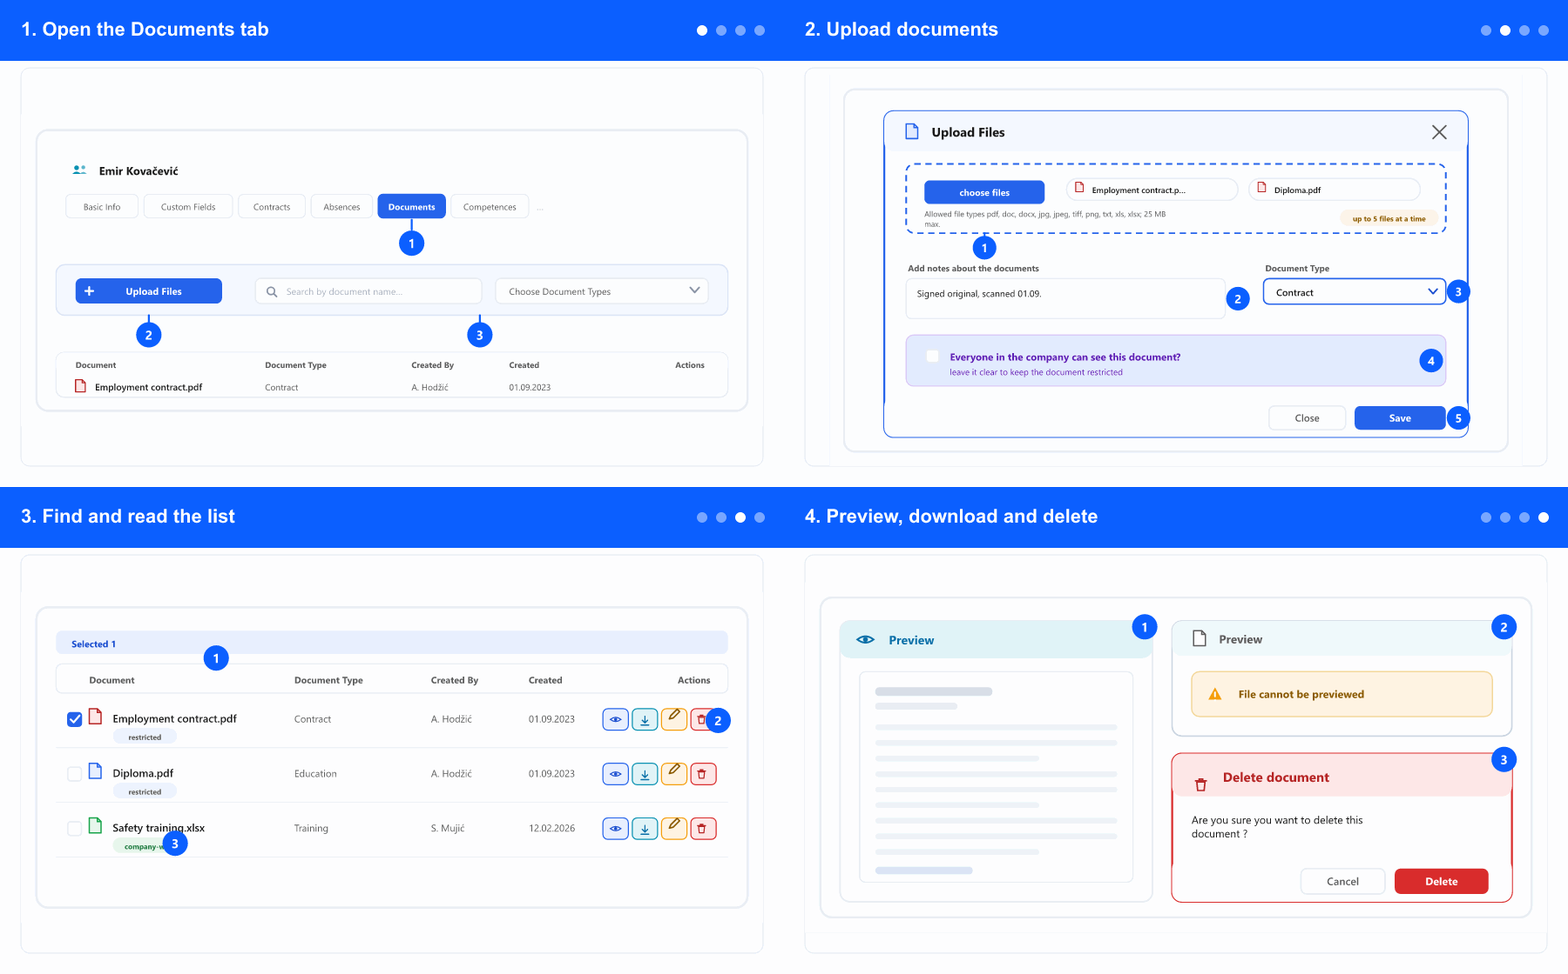
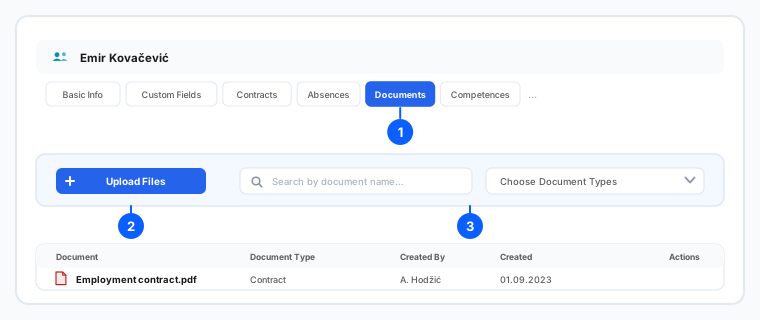
1. Open the Documents tab
- In the left menu, open the ADM tab and select Employees. The tabs (ADM / DMS / CRM / ATS) appear only when your company uses more than one module.
- Click the person's name to open their record, then select the Documents tab.
- You can always open your own Documents tab. To open someone else's you need permission for the employee list — without it the app takes you to a no-access page.
- Administrators see everything and can add, edit and delete.
2. Upload documents
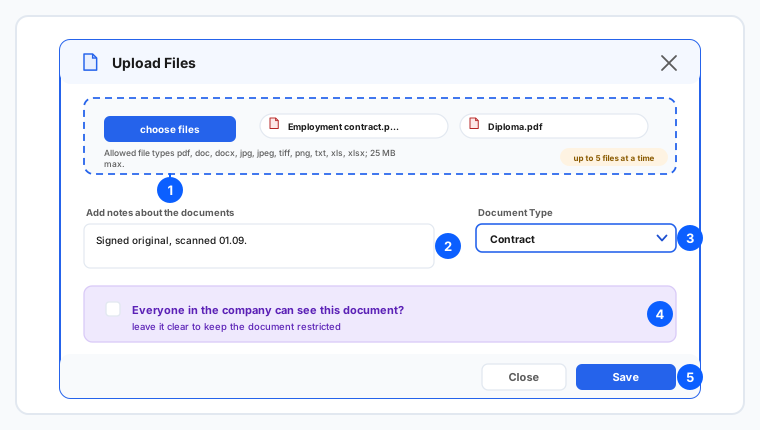
- Click Upload Files. The upload window opens.
- Choose the files. Allowed types are pdf, doc, docx, jpg, jpeg, tiff, png, txt, xls and xlsx, up to 25 MB each.
- You can add up to 5 files at a time here. If you pick more, a warning tells you the allowed number and you can upload the rest in a second pass.
- Use Add notes about the documents for anything the file itself does not say — for example that it is a signed original, or when it was scanned.
- Pick the Document Type. This is what the filter on the list uses later, so choosing it now is what makes the document findable in a year's time.
- Decide the visibility with “Everyone in the company can see this document?”. Leave it clear for anything personal — a contract, a medical note. Tick it only for documents that genuinely concern everyone.
- Click Save. The documents appear in the list straight away.
3. Find and read the list
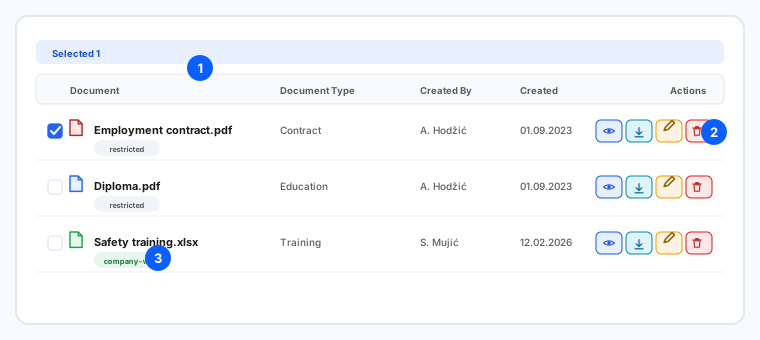
- The list shows each document with its name, Document Type, who uploaded it (Created By) and when (Created).
- Type in the search box to filter by document name, and use the document type filter to show only one kind — contracts, diplomas, and so on. The two work together.
- Tick rows to select them; the bar above the list shows how many are selected.
- Each row carries the same four actions in the same order, so the column stays easy to scan: preview, download, edit and delete. Actions you have no permission for stay unavailable.
4. Preview, download and delete
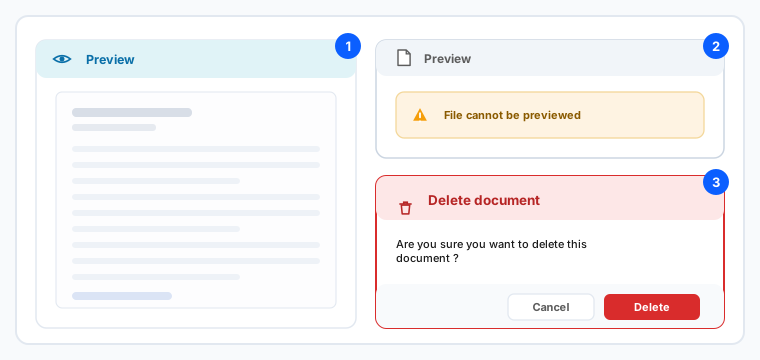
- Click preview to open the document in a window, without downloading it — handy when you only need to check you have the right file.
- Some formats cannot be shown in the browser. Then the window says “File cannot be previewed” — download it instead; the file itself is fine.
- Download saves the original file to your computer.
- Edit lets you correct the details you set when uploading — the note, the type and the visibility.
- Delete asks for confirmation first. Deleting removes the file itself, so if it is the only copy of a signed document, download it before you delete.
Which actions you see depends on your permissions. The visibility checkbox is per document, so one employee's record can hold both restricted and company-wide files. Company documents that are not tied to a person live in the DMS module instead.
Related: Fill in and change an employee's basic data · Employee contract linked documents (annexes).