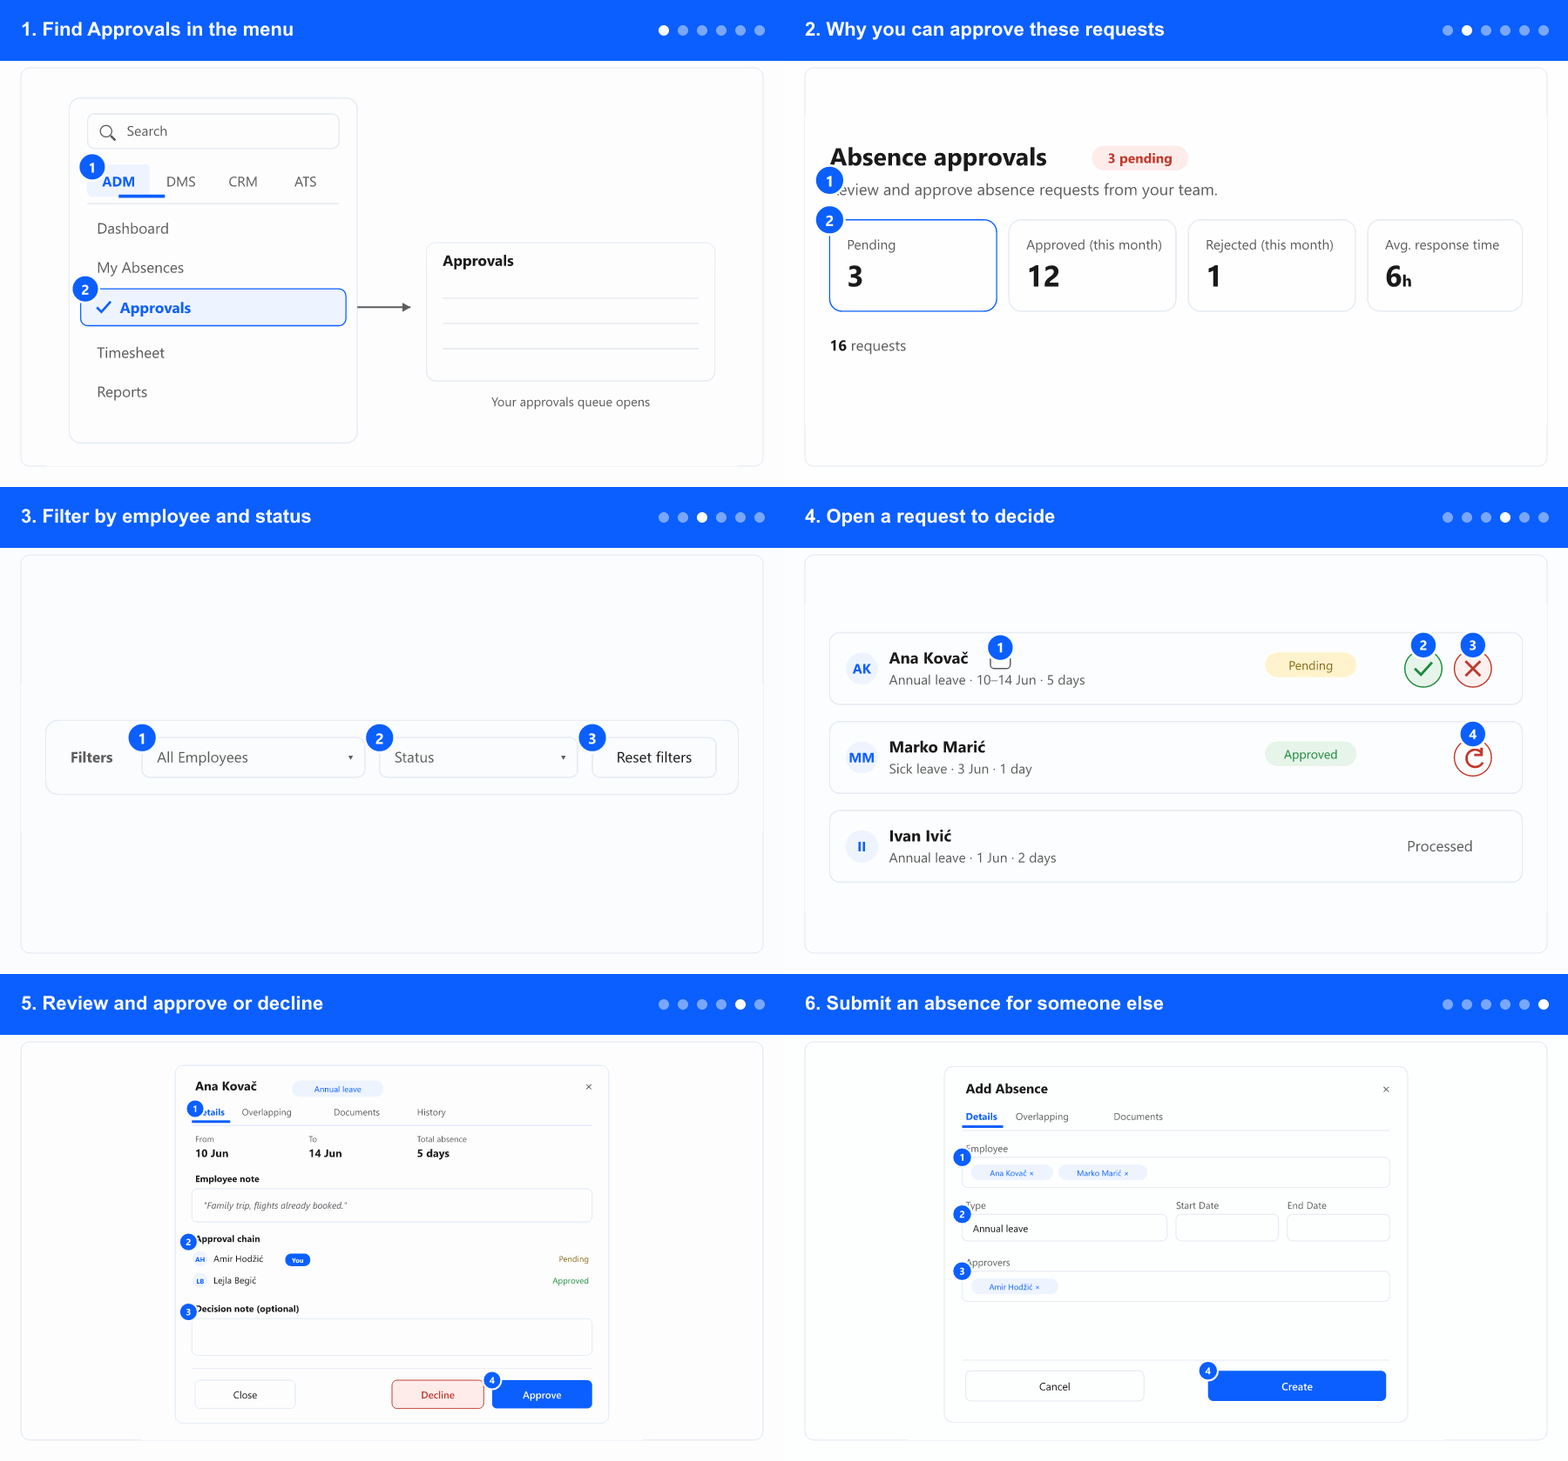
1. Find Approvals in the menu
- In the left menu, open the ADM tab. The tabs (ADM / DMS / CRM / ATS) only appear when your company uses more than one module — otherwise the menu items are shown directly, so skip to the next step.
- Select Approvals. Your approvals queue opens.
- Don't see Approvals? It appears only for users who can approve absences — ask a company administrator.
2. Why you can approve these requests
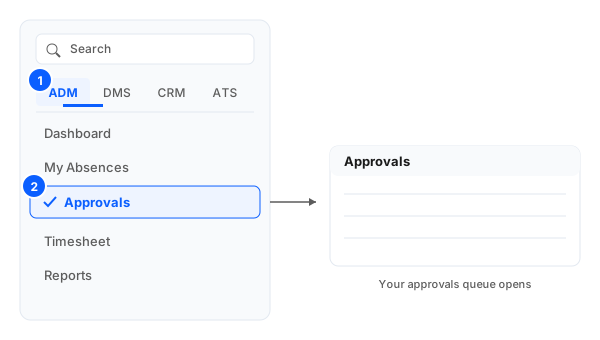
- The screen lists requests from your team — the employees you are set up to approve for. If you also hold a broader role, you may see more.
- The cards summarise your queue: Pending, Approved (this month), Rejected (this month), and Avg. response time. Click a card to filter by that status.
- The list opens on Pending by default, so the requests waiting on you are front and centre.
When an employee submits a new request, a notification is also sent to the approver's (manager's) email — you don't have to keep checking this screen.
3. Filter by employee and status
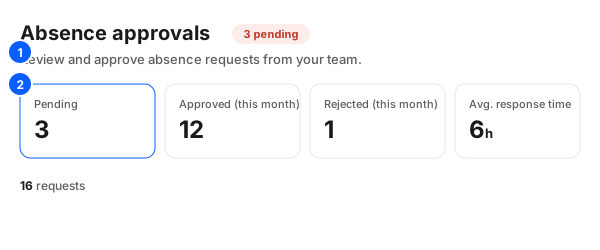
- Use the employee dropdown to focus on one person (the list contains only employees you approve for).
- Use the Status dropdown to switch between pending, approved, rejected, and so on.
- Click Reset filters to go back to the default view.
4. Open a request to decide
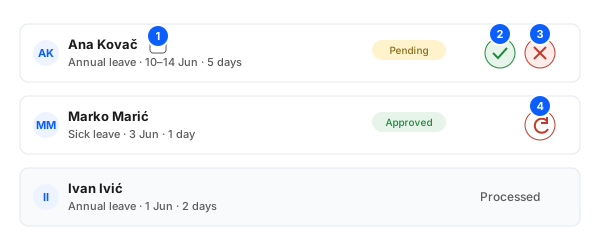
- If a row has a note icon, click it to read the employee's comment.
- On a Pending request, click the green ✓ (Approve) or the red ✗ (Reject) — both open the decision dialog (next step).
- For a request you already approved, the revoke action (curved arrow) lets you undo your approval.
- A request marked Processed has already been decided and has no action.
5. Review and approve or decline
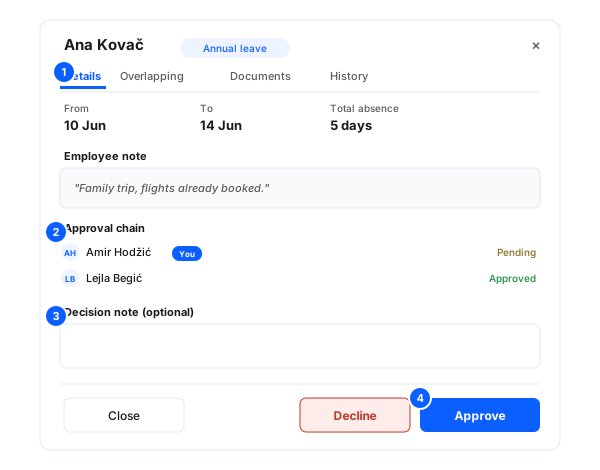
- Review the request: the Details tab shows the period and total, the employee's note, and (for vacation) the remaining-days balance. The Overlapping Absences, Documents and History tabs give more context.
- Check the Approval chain — who else approves and where it stands; your own step is marked You.
- Optionally add a Decision note for the employee.
- Click Approve or Decline. The employee is notified of your decision.
6. Submit an absence for someone else
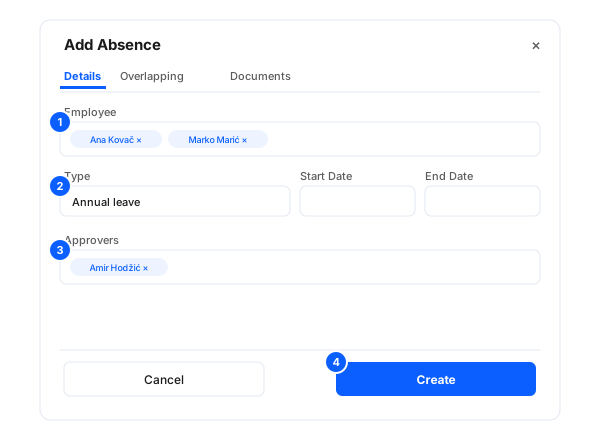
- Click Add Absence (top right) to open the dialog.
- Pick the Employee — you can select one or more people to submit the same request for all of them at once.
- Choose the Type and the Start/End dates (or hours), and set the Approvers. The Overlapping Absences tab flags clashes with existing absences; Documents lets you attach files.
- Click Create to submit the request.
7. Old version
- If you need the previous layout, use the Old version link next to the page subtitle to switch back to the classic approvals view.